I have 8 of the Rainbow Lights MICRO LED 4 RGBWA+UV, Wireless DMX, Battery Uplight with Remote, Ape Style BLACK (https://www.rainbowlightsus.com/product-page/micro-led-4-rgbwa-uv-wireless-dmx-battery-uplight-with-remote-ape-style-black?srsltid=AfmBOordS6nYoJMi-JtHh4dKzQhBSIiwo5EYGt_FuCxRRD6OwwSIRcAb) that I need to get added and start creating light shows.
Hello, I can do a session over zoom / google meet with you if you like. Unless you are in South West UK and then maybe in person!
This is me: www.hungrymandj.com
https://youtube.com/@hungrymandj?si=EEueV8HOLM7EjGtA
Please email me to discuss further hungrymandj@gmail.com
Please, I’m a visual learner and the software is not making sense to me
Hi @jonnyboy, thanks for reaching out!
I merged your three posts into one, as they were all about the same topic. I’d like to kindly ask you and anyone else getting in touch here to always provide some more concrete information about what you are struggling with and specifically mention what you have already tried, rather than just broadly saying you need help. This enables us to help you faster, understand how exactly we can make things more approachable, and give answers that may also help other future users with similar issues.
You can create fixture profiles for your fixtures using the Fixture Editor that comes with an extensive manual. Have you already checked that out?
We would like to add video tutorials about this when we can.
I’ll lead you through the process of creating a fixture profile for your Rainbow Lights MICRO LED 4 RGBWA+UV fixtures.
Navigate to the link you provided, download fixture manual and look for the DMX channel layout:
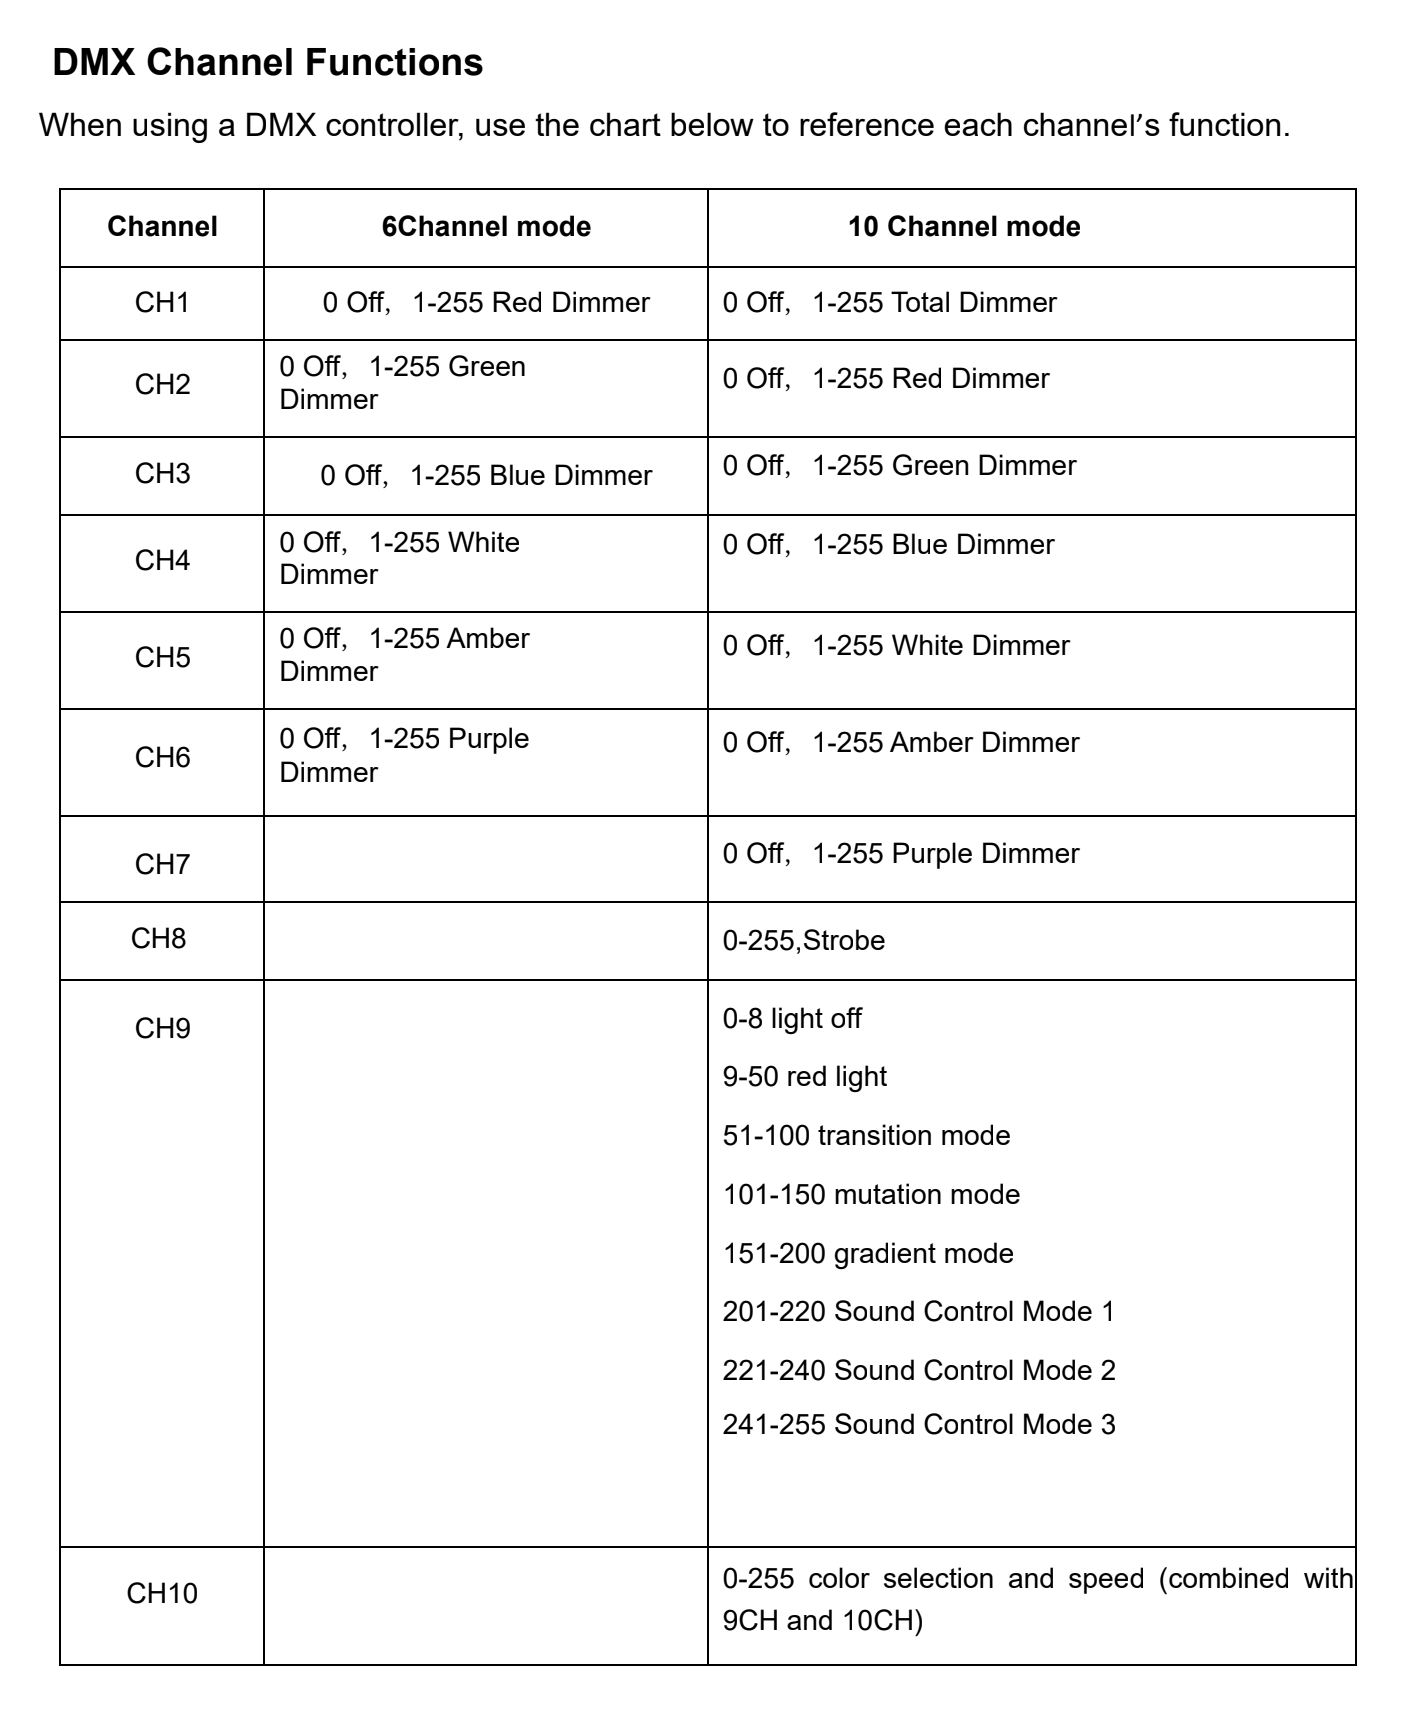
This tells us that the fixture can operate in two different DMX channel modes:
- 6-channel (Red, Green, Blue, White, Amber, Purple channels)
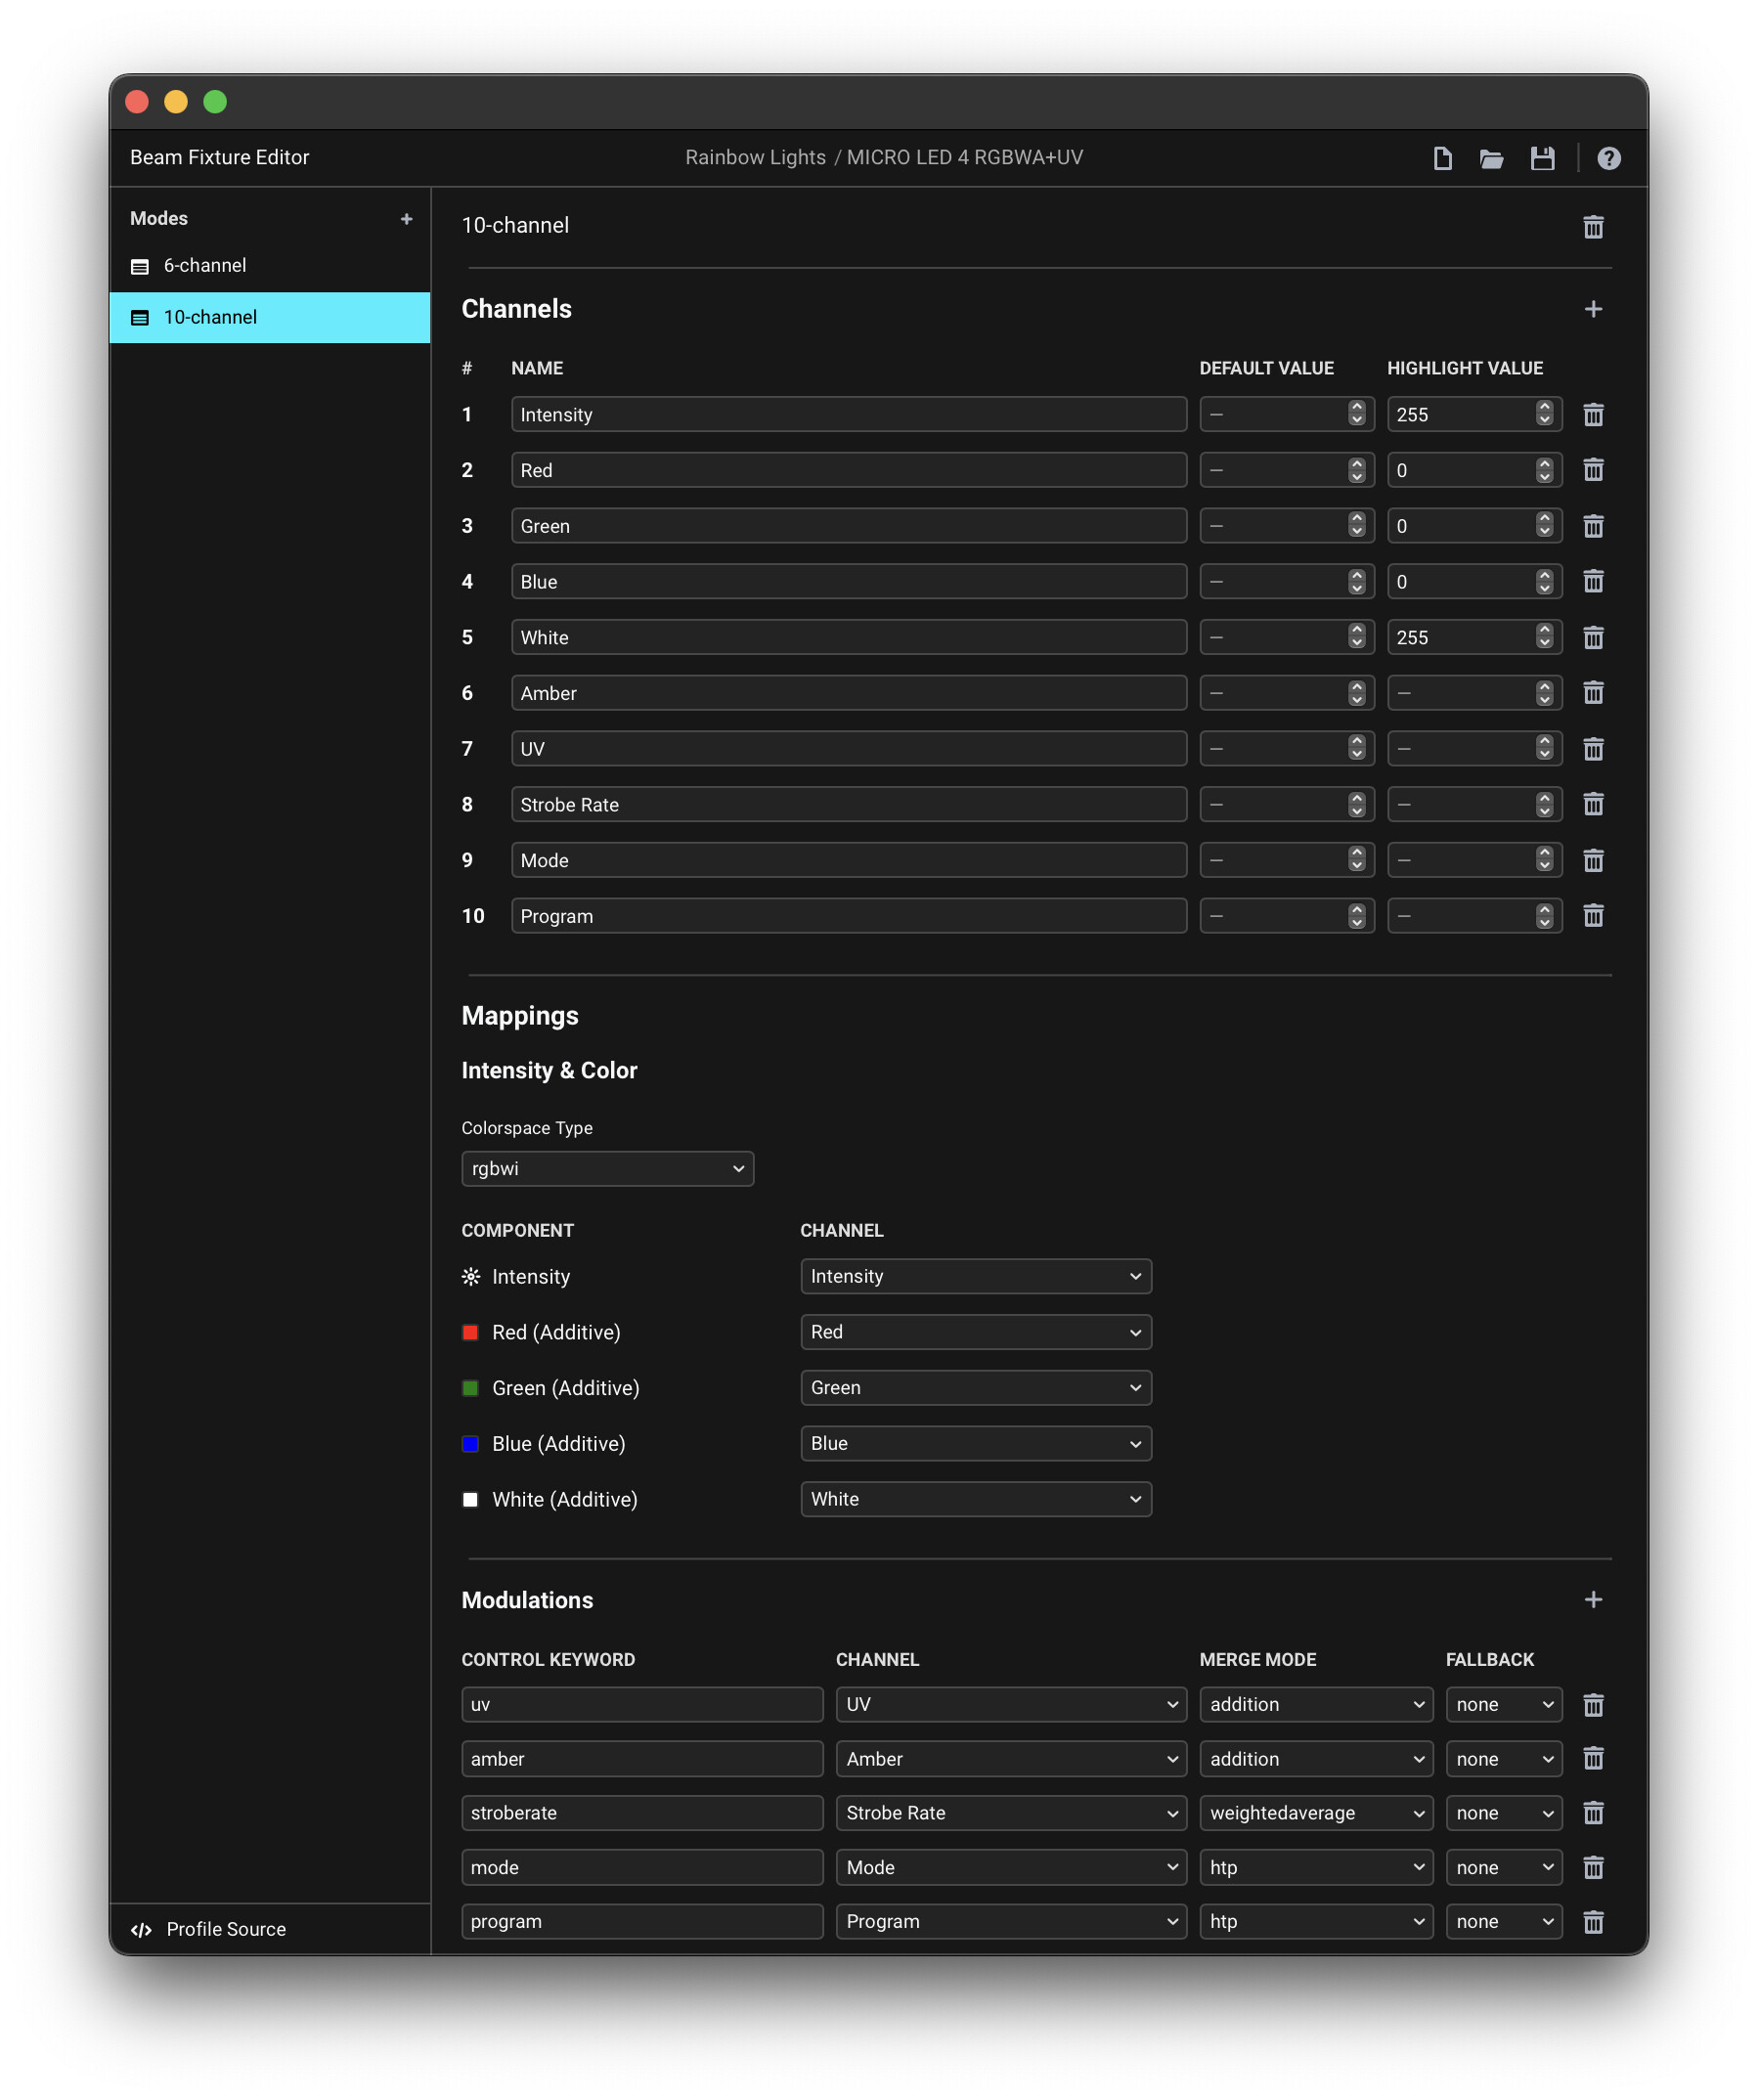
- 10-channel (Intensity, Red, Green, Blue, White, Amber, Purple, Strobe, Mode, Program)
Let’s start by creating a fixture profile for the 6-channel mode.
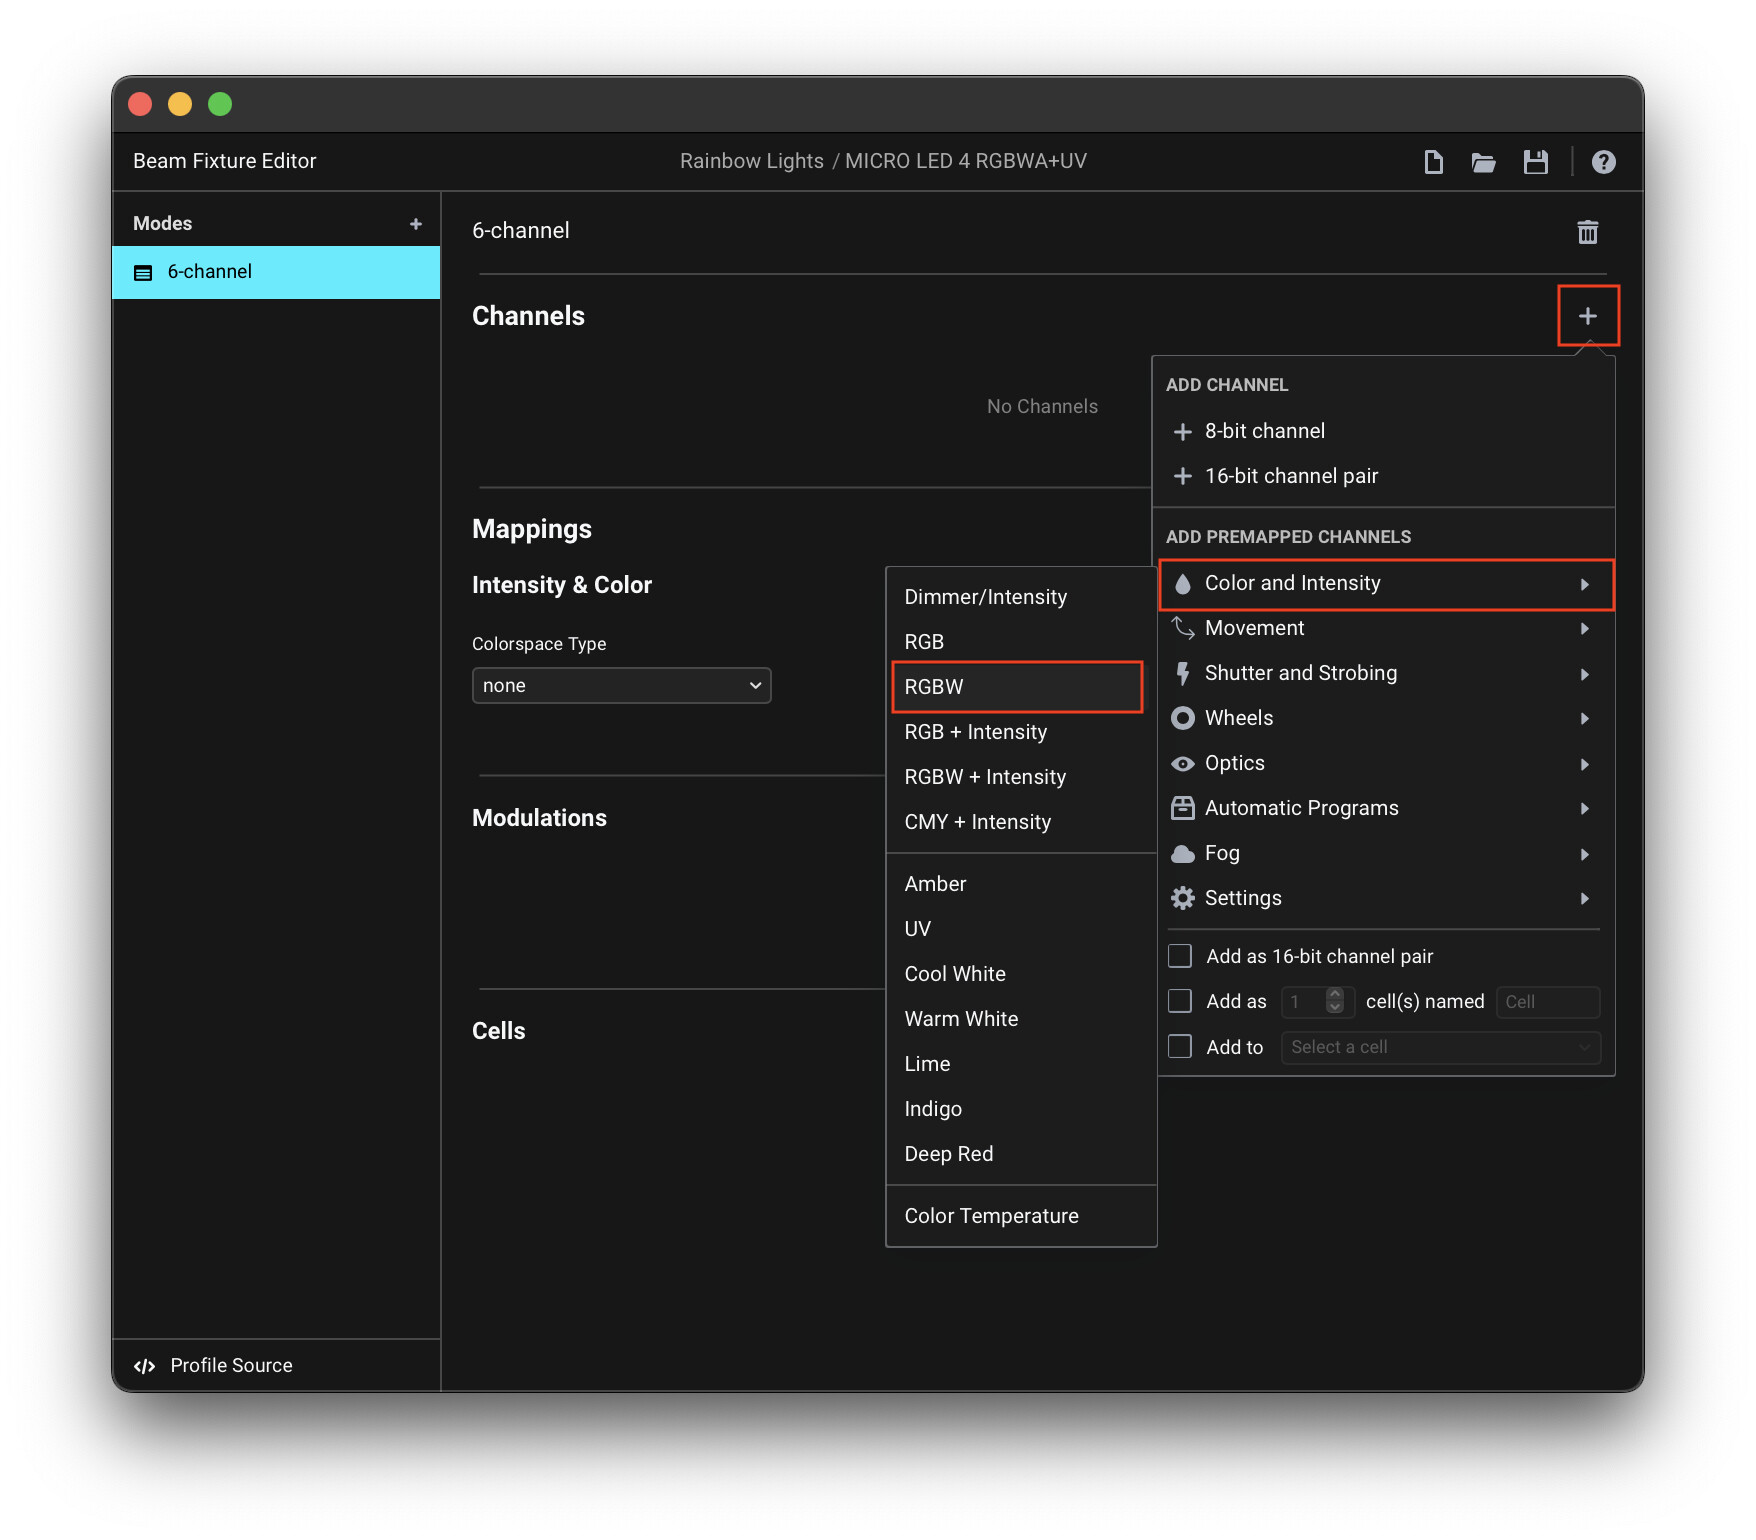
Open the Fixture Editor, fill in the fixture name, and add a new mode. We can add the first four channels and their corresponding mappings in one go, by pressing the Add Channels (+) button and selecting Color and Intensity > RGBW:
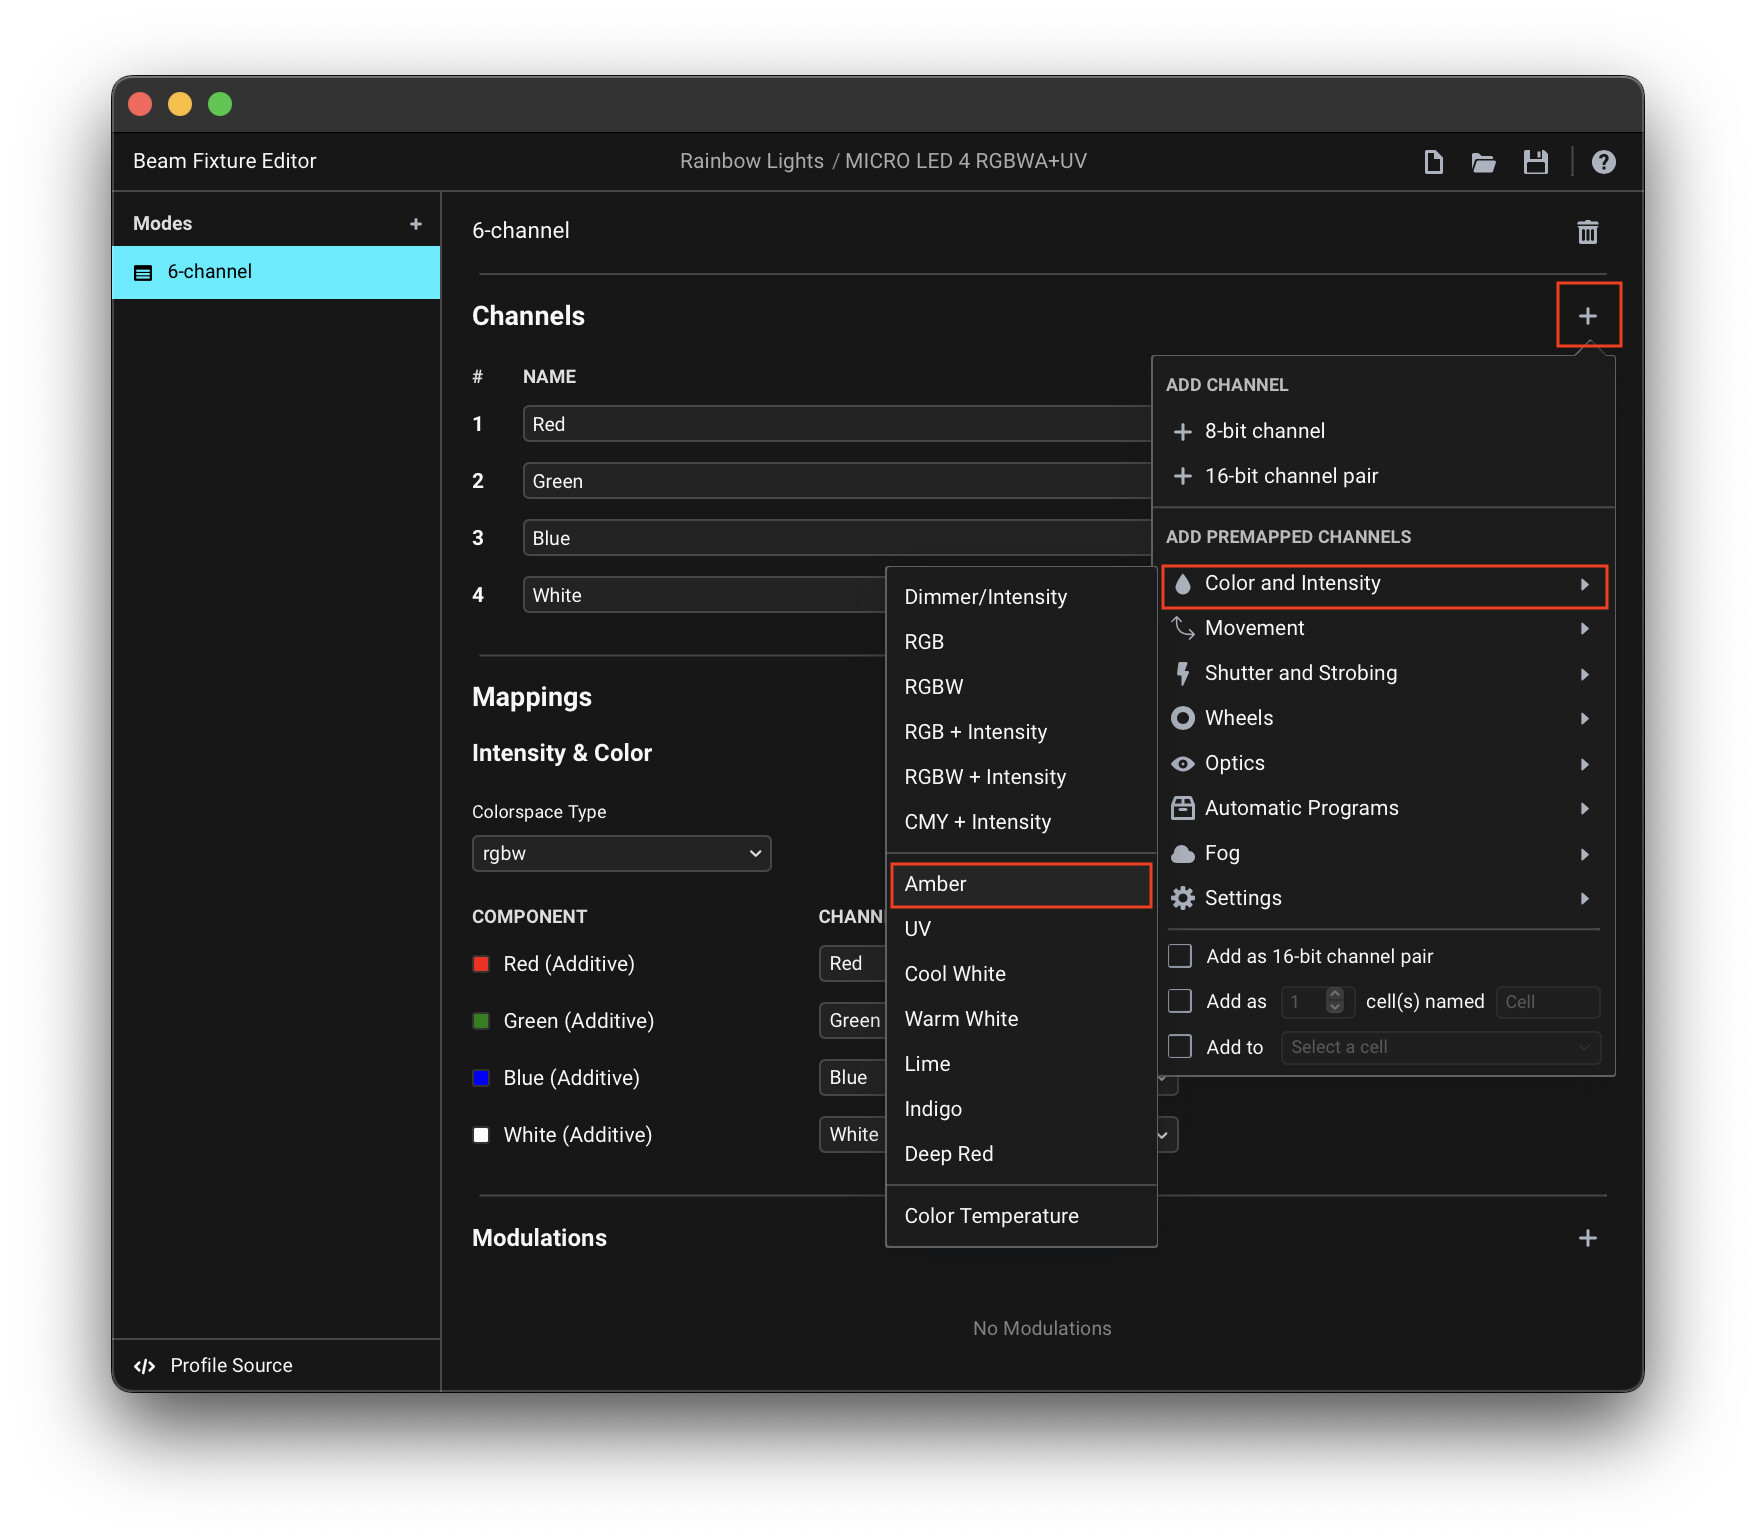
Repeat the same for the Amber and Purple (you can use the “UV” preset for that) channels:
The fixture profile for the 6-channel mode is now complete:
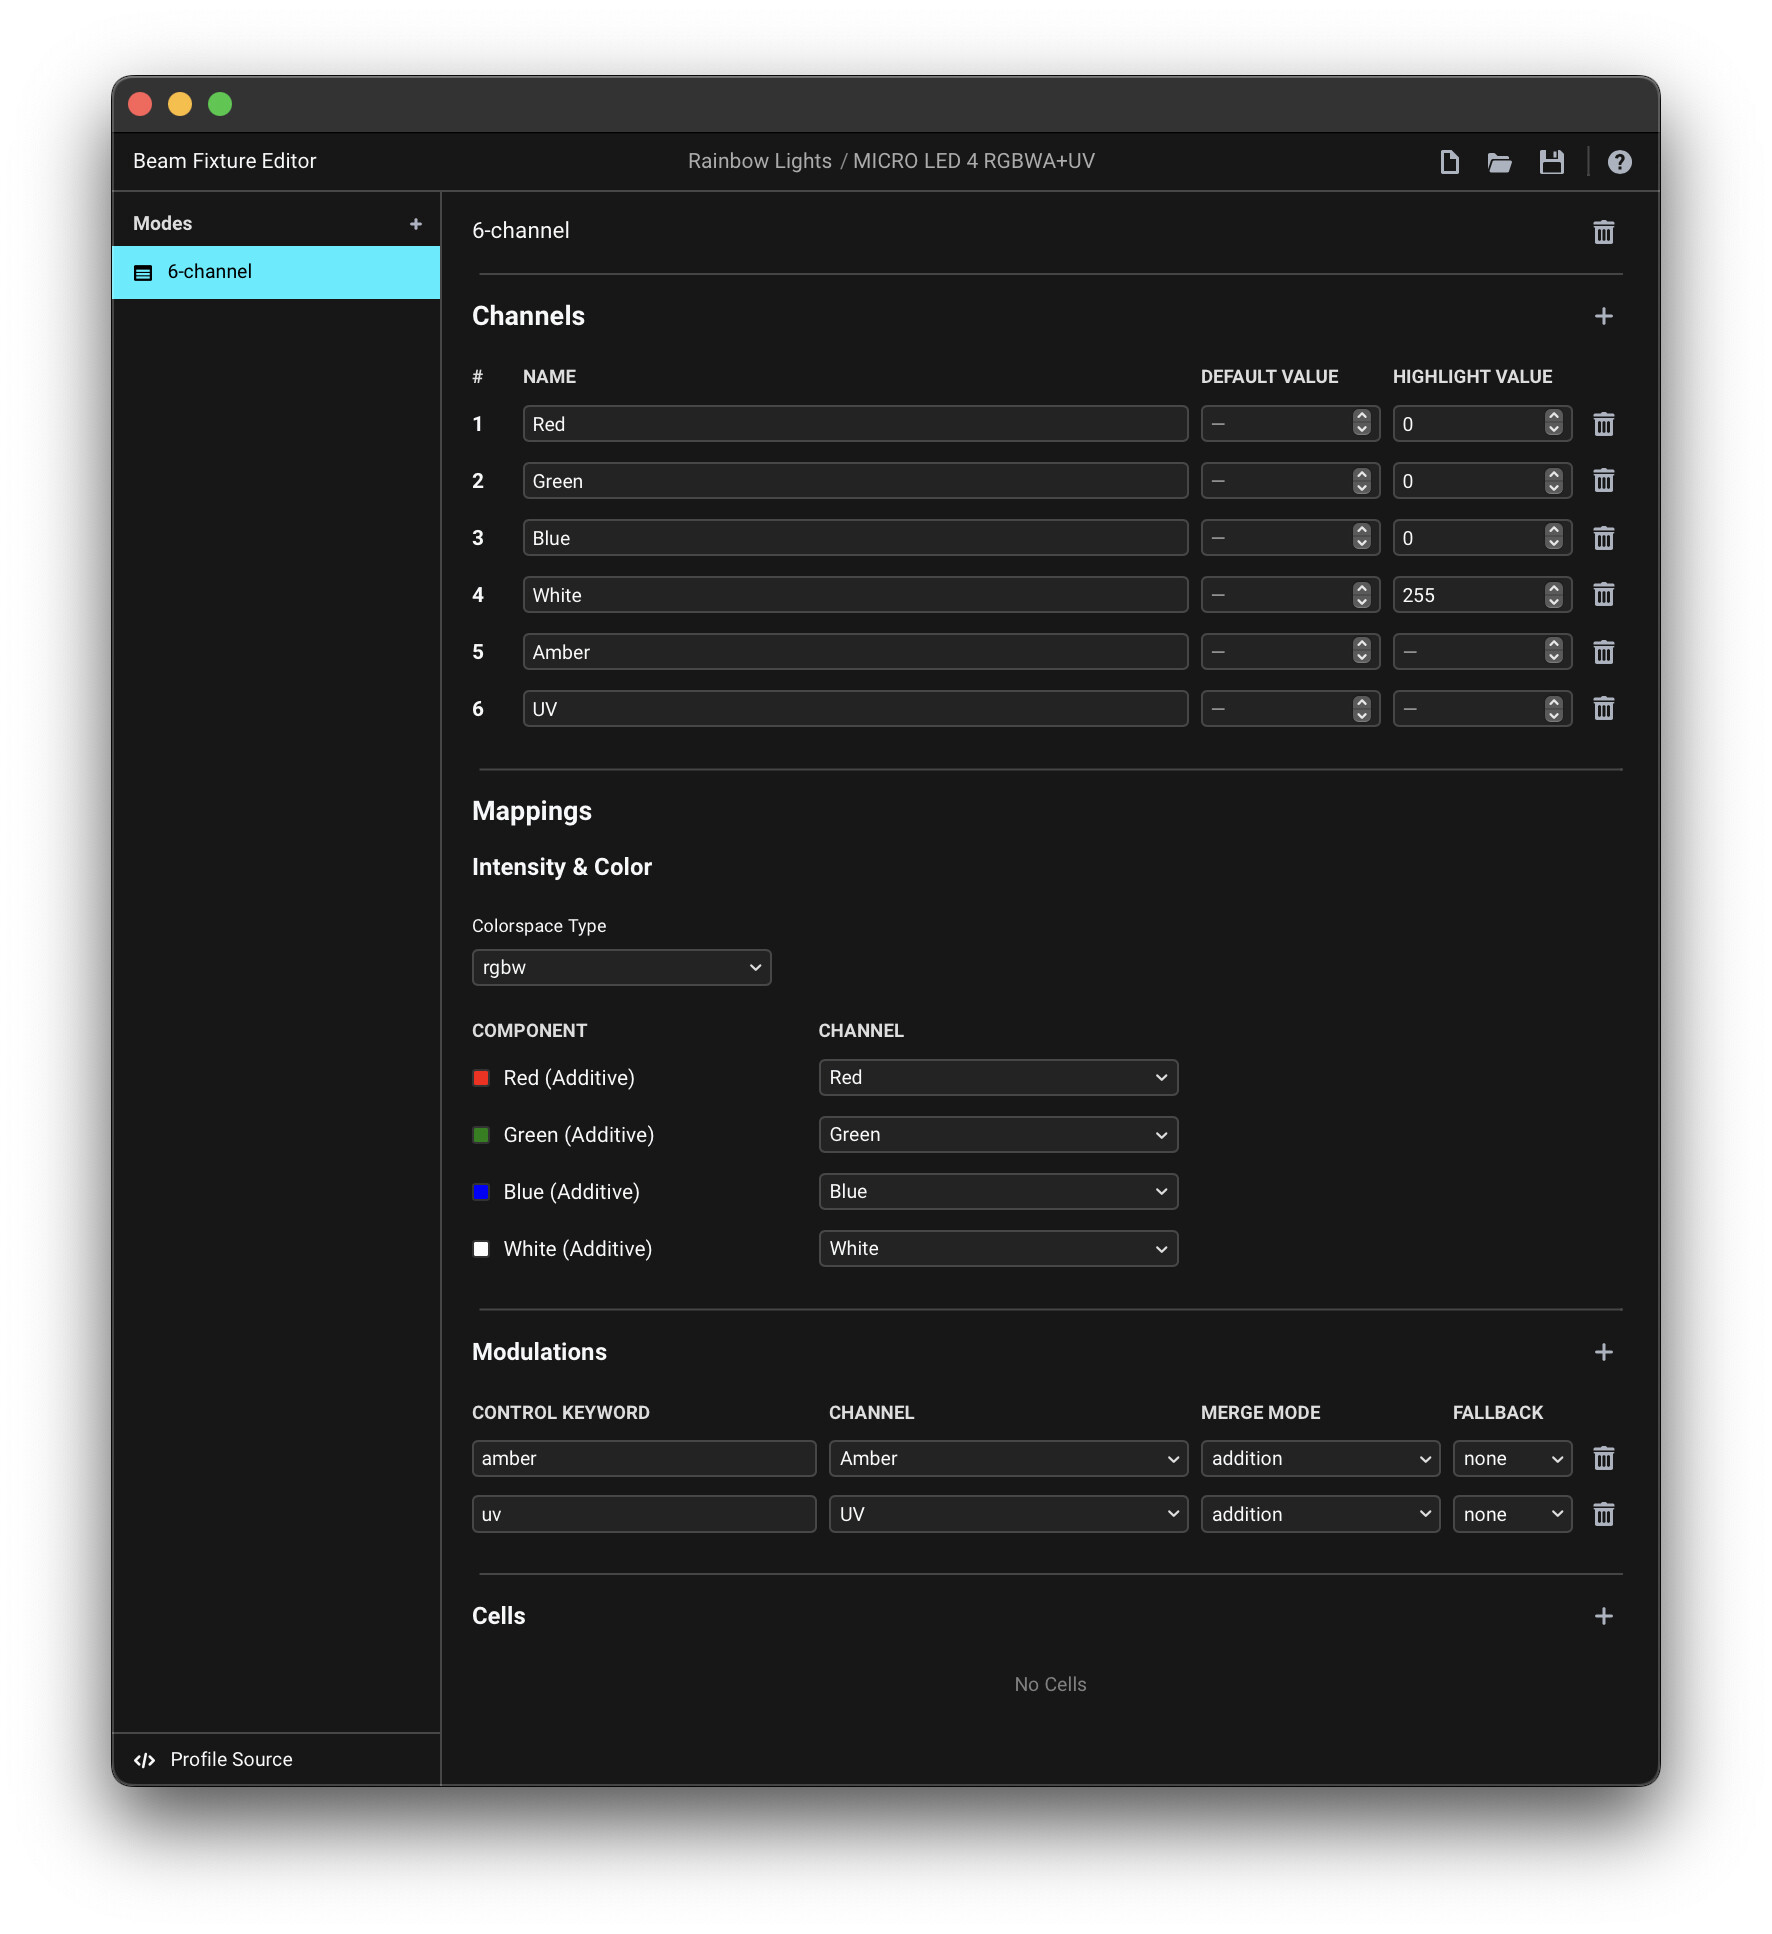
Note: If you look at the Mappings section, you will see the Red/Green/Blue/White channels assigned as the Intensity & Color components, while Amber and UV are mapped as amber and uv Modulations.
Beam uses channels assigned to the Intensity & Color to control the intensity of the fixtures using all the various signal flow functionalities of Live (Track Volume, Solo, Mute, etc.), and automatically create color-mixes using the colors selected via the color chooser parameters on Beam devices. There is no dedicated support for this when it comes to channels like Amber and UV, which is why we added them as direct Modulations, which we can control using the amber and uv keywords.
The process for adding the 10-channel mode is similar:
Final result: Rainbow Lights MICRO LED 4 RGBWA+UV.sbf (3.2 KB)
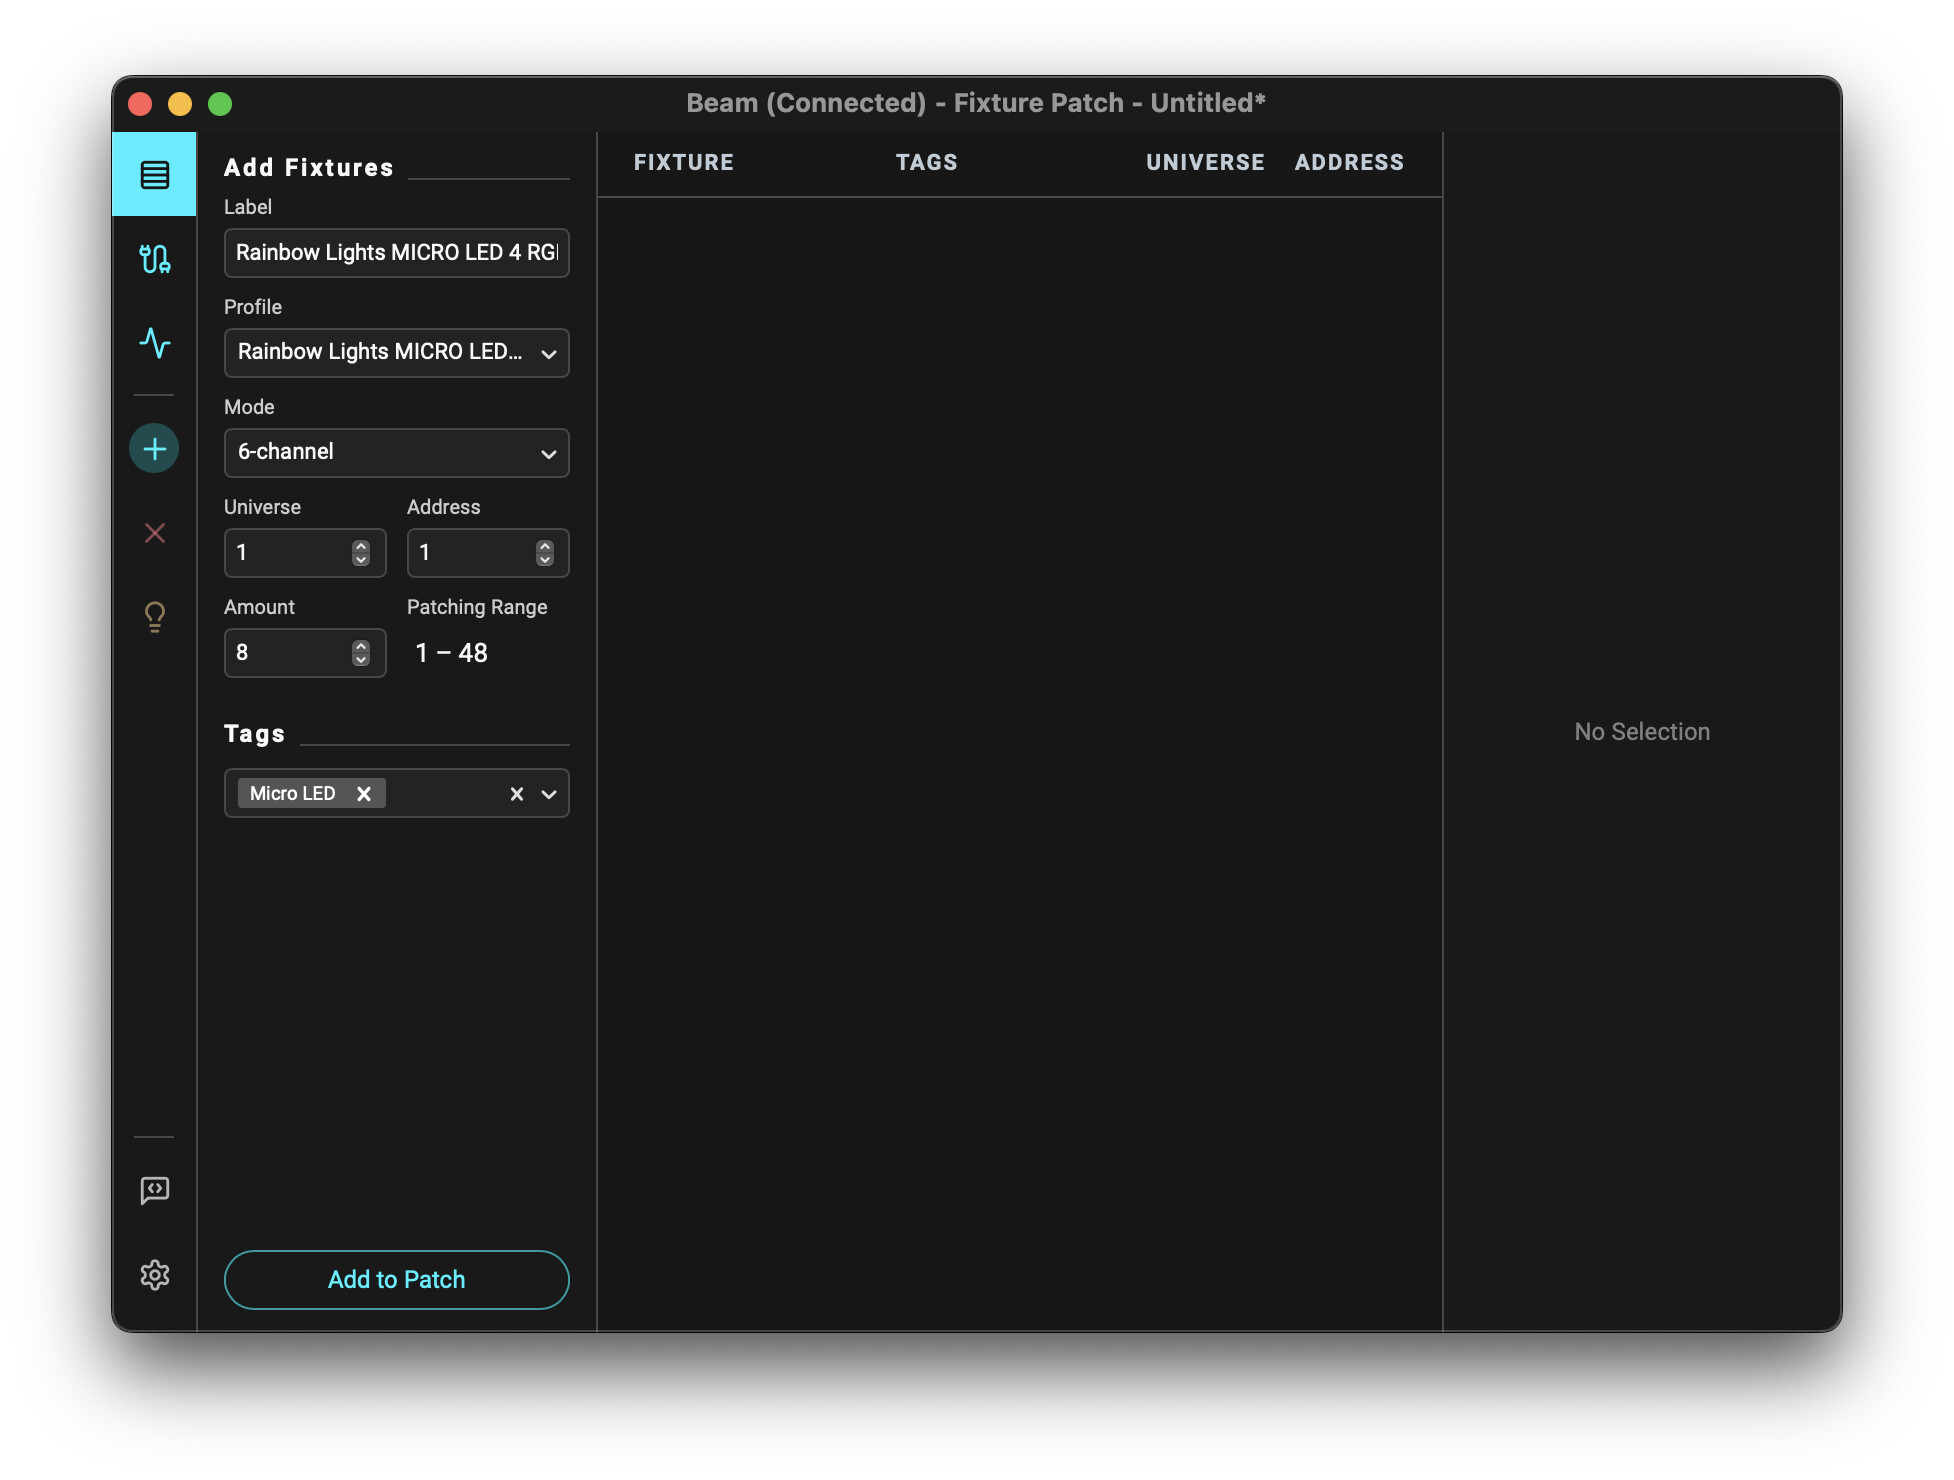
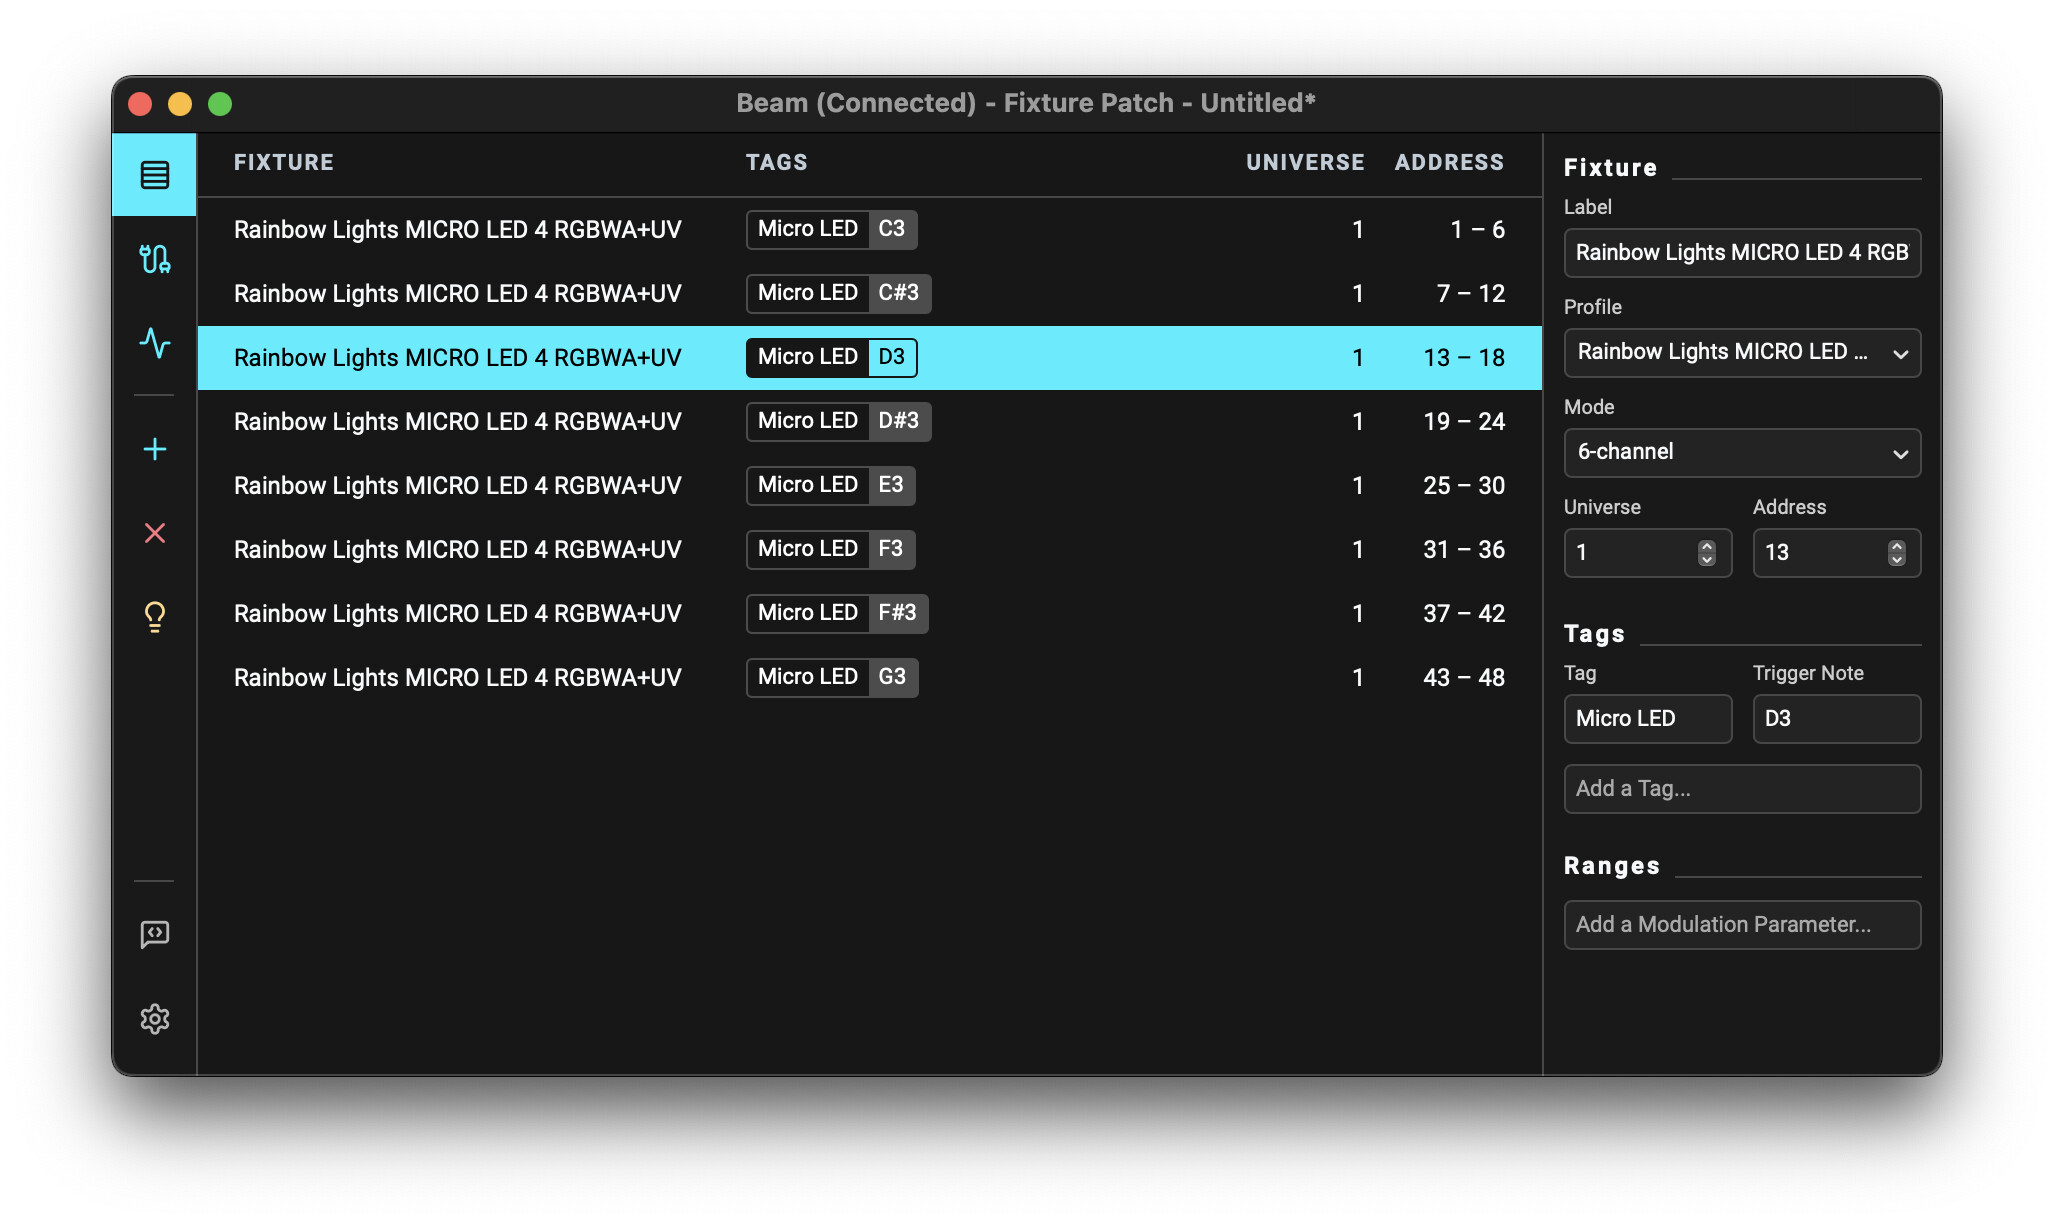
Download/save the fixture and move it to your Documents/Beam/Fixture Profiles/User folder. Restart Beam and the fixture(s) can now be added to your fixture patch. Make sure the fixtures are set to the 6-channel mode and that the DMX address range you specify matches the addresses set on the fixtures.
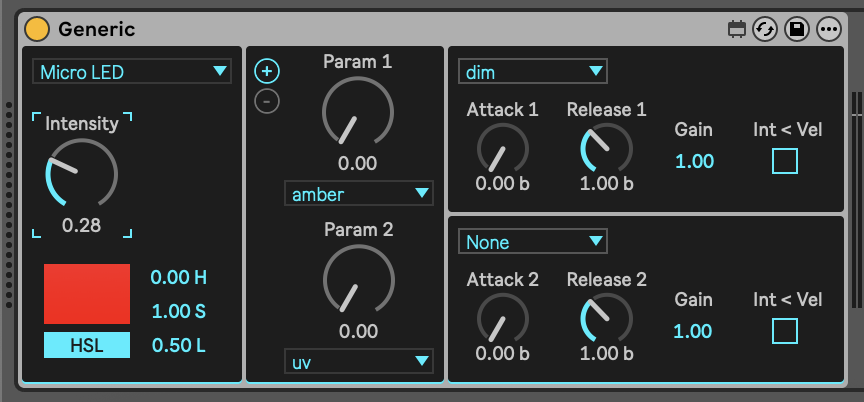
In Live you can control the fixtures using the Generic instrument device, via any tag you assigned to the fixtures (e.g. Micro LED):
In order for Beam to output DMX to your fixture, you need to specify your output DMX interface in the Inputs/Outputs section.
Hope this helps. Please let us know if you have any other questions.