PLEASE HELP! motion working but lights will not

Hey guys,

I am having troubles. So i recently got beam but im a looooong time user of abelton. very familiar with automations. etc. I followed the instructions provided and have a Chauvet intimidator 260x running currently. however there is no lights. the motions work as should. the effects will move the heads. and automation moves the heads. however nothing will turn the lights on. i tested the lights to ensure the bulbs are not blown and the bulbs work fine (not in dmx mode) please help.

Hi Caleb,

That movement works means that there’s a lot we can cross of the list of potential problems.

Did you use a fixture profile that’s shipped with Beam or did you create one yourself? And is the light in 8ch or 14ch mode?

Perhaps you could check Beam’s monitor to see what DMX values are being sent out, and compare these to what the light expects. This might give us a hint.

Hi Caleb,

In addition to Hidde’s suggestions, please make sure that the Strobe channel is at an Open position. In this case you could do that by setting the shutterstrobe modulation parameter to 1.0.

When the Strobe channel 8/12 (depending on the mode you are using) of Intimidator 260 is at DMX value 0, you won’t see any light, even with the Dimmer channel active:

I suspect this might be the issue here.

How would I do this? On the light itself? I also believe this is the problem because when I set the LFO effect to shutterstrobe the light blinks

When I use generic instrument rack and set the parameter 1 knob to shutter strobe. And then turn the knob to .2 the lights come on. But midi notes nor any other effects units will change color or do anything pertaining to color. I can set another parameter to cycle thru the color wheel but that’s it. I should be able to choose which color I want at anytime and use the motor function along with colors correct?

UNHOOKED MOVING HEADS AND PLUGGED IN SOME PARS. (moving heads lights not working)

I finally got some lights going …lol but it looks like crap. the presets that come from the manufacture looks better than what is coming out of this program. there has to be a better and more intuitive program for this application. all of the parameters are just random. i cant get anything to match colors or consistancy. It seems like i am just turning parameter knobs and hoping to hit the same setting twice. please help because at this point im feeling very hopeless and about to give up.

Hi @Caleb,

Sorry to hear you’re struggling, we’d be happy to help you make it all work! :slight_smile:
There are a few different things at play here, so let’s take it step by step.

A quick test

Before we dive in, here’s a quick test of Live & Beam controlling 4x Intimidator Spot 260X fixtures inside Capture’s virtual lighting rig, to confirm everything is working. I used the 14ch factory fixture profile.

MIDI notes in Generic

To work with MIDI notes in Generic instrument, you need to select a modulation for which an envelope will be triggered when a MIDI note is received, e.g. dim for Intensity:


You can read more about Generic here.

Controlling color wheel

The HSL/RGB color chooser on Beam devices is currently only relevant for controlling color in fixtures that have individual color component intensity channels (e.g. Red, Green, Blue) for color mixing.
Spot moving heads (such as the Chauvet Intimidator Spot 260X) commonly use a color filter wheel, which comes with a number of fixed color positions that you can recall using a single Color wheel DMX channel.
In Beam we usually use the colorwheel modulation to address such a channel, and modulation values between 0. and 1. (mapped to DMX values between 0 and 255) can be used to recall color presets activated at different parts of the channel range.

To understand what to expect from a specific fixture and how to set up Beam or any other software or lighting console to control it, it is always a good idea to first check out the fixture’s manual, especially the DMX chart. If you look at the DMX implementation of Chauvet Intimidator Spot 260X (pages 4-6 of this document), you will notice there are no individual Red/Green/Blue color channels and there is indeed only the Color wheel, which has the following presets at the indicated DMX values:


Knowing what color/preset to expect at a certain range of the channel, you can then start by slowly increasing a dial that controls the colorwheel modulation from 0. to 1. and observe how the range of the dial translates to the DMX range in the table. E.g. 0.0 should be White, 0.04 Red, 0.06 Orange, and so on. The same applies for any slot-based channel, such as Strobe (shutterstrobe) or Gobo wheel (gobowheel). Using Beam’s Monitor can also be helpful to confirm you are sending out the right DMX values.

Other approaches to slot-based channels

Controlling slot-based channels using modulation values between 0. and 1. can sometimes be inconvenient. To work around this, you can (currently):

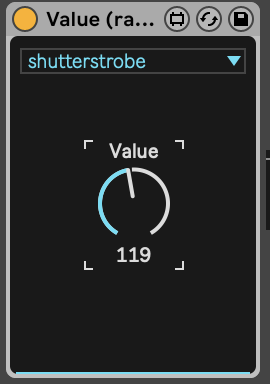
  • Use a custom device that allows you to control a modulation with values between a 0 and 255 (make sure there are no Ranges applied to the target modulation in the Patch): Value (raw DMX values).amxd (242.7 KB)

  • Choose to only use a specific range of the channel, such as 0-64 to only work with the static colors of the Color wheel/colorwheel channel, or 4-76 to only use ON & Strobe, slow to fast portion of the Strobe/shutterstrobe channel in Intimidator 260X - then using modulation values between 0. and 1. makes more sense. You can set the Ranges in the Patch Editor:

  • Make a custom M4L device for handling slots of a specific fixture.

Other questions

I should be able to choose which color I want at anytime and use the motor function along with colors correct?

Yes.

How would I do this? On the light itself?

You can do that by setting the value of shutterstrobe in Generic instrument.

I also believe this is the problem because when I set the LFO effect to shutterstrobe the light blinks

Using LFO effect with shutterstrobe channel will result in DMX values scrolling through the channel range…

…switching through a lot of different settings in short periods of time and is guaranteed to look flickery and unexpected, likely not what you had in mind at this point.
LFO works best for controlling channels with a single continuous range, such as Dimmer, Pan and Tilt.
One case where LFO could be a sensible choice with a Strobe channel is e.g. to make the speed of strobing continuously change between slow and fast. To achieve that with a channel that has multiple ranges/slots, as is the case with Intimidator 260X’s Strobe channel, I would recommend limiting the Range to a single range, as described above.


Hope this helps making some steps further. Please let us know how it goes and if you have any further questions.

1 Like

Wow, thank you so much. I feel bad for you to have to spend all that time on this but I feel that I’m starting to understand a little better. You guys are amazing. It’s 9 am on a Sunday and you helping me .

Sincerely thank you

2 Likes


ITS WORKING!!!

But only one of them the other on c#3 isn’t working

Awesome! We’re very close to having it all work. I think the reason C#3 isn’t working is because you have shutterstrobe selected twice: Param 1 and Param 3.

The Generic Instrument has a feature where you can assign the same modulation to multiple dials. It’ll spread out the values of the dials out over the number of fixtures in your patch. In this case, Param 1 will control the shutterstrobe value for C3, and Param 3 for C#3. And since Param 3 is set to 0.00, the shutter is closed and you don’t see any light.

If you increase the value of Param 3, C#3 should work for you. Alternatively, you can set Param 3 to None so that Param 1 controls both fixtures.

Here’s some more information about how this works: Instruments | Showsync Support

1 Like

DUDE!!! ITS WORIKING!!! you guys are amazing geniuses. I think i am getting the hang of it.

Is there was a way for me to save this instrument rack as a “preset” to recall later. in stead of having to go to each peremeter and tell it what to function each time?

1 Like

1 Like

Amazing! Looking great!

Is there was a way for me to save this instrument rack as a “preset” to recall later.

Yes, you can just use the little save-icon in the device header to save your device as a preset. You can also wrap the device in an Instrument Rack and save the Rack including Macro mapping, variations, etc. This is all the same as working with audio instruments/effects in Live.

1 Like


4 very cheap Par cans off Amazon. Don’t know the name. I got them all synced up and showing same thing at same time. There’s only one knob that does anything. It will cycle the colors, flash, swell. Etc. It flashes red before switching values each time. Otherwise I could work with it

Yeah these pars are kicking my butt. So I hooked up some Uking RGBs and I’m still really not understanding. So I used the Par instrument rack. And it makes sense that depending on what value is dialed in will be the color. But it’s soooooo inconsistent. And when I put them on midi notes it goes crazy and random stuff. Please help