Hi @HPK,
Thanks for getting in touch!
beam.core is a sort of “global management” object that lets you specify your lighting configuration (fixture patch and inputs/outputs - see more about this below). Think of it as a lighting equivalent to the Max’s Audio Status window.
beam.output is an object you can use to route lighting signals from Beam for Max’s objects such as beam.tag, beam.catch~ and beam.matrix to beam.core. Its equivalent in the MSP world would be dac~.
There is also the beam.dmxio, which allows you to send raw DMX data, as a (simpler, but arguably less flexible) alternative to fixture-oriented approach offered by the objects mentioned above. If you choose to go this way, you still need to specify your output configuration using beam.core, as described below.
A lighting configuration consists of:
Fixture patch
This is something you use to specify the fixtures you are working with, and the DMX addresses these fixtures are expecting to receive DMX data at. This is also where you assign tags to fixtures - a tag is a keyword you use to refer to a group of fixtures in your Max patch.
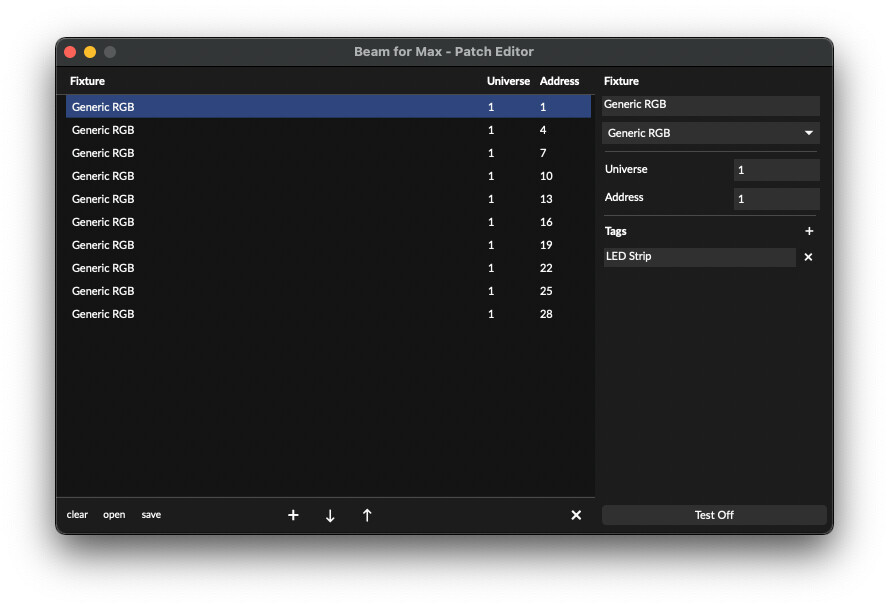
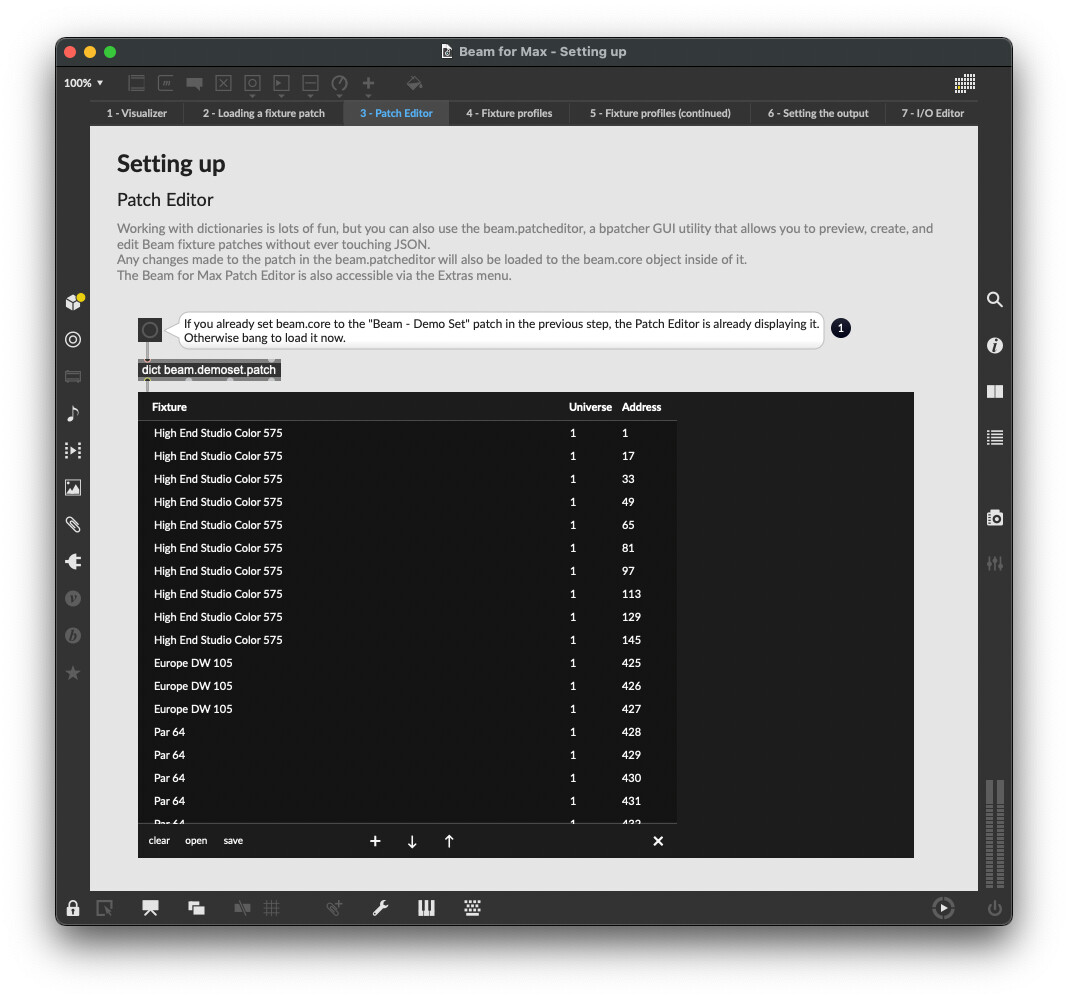
You can set a fixture patch by sending a dict prepended by set_patch to beam.core (see the help file), or by using the beam.patcheditor abstraction (also found at Extras > Beam for Max > Beam for Max - Patch Editor), which internally uses a beam.core:
The screenshot above is how a fixture patch for controlling a 10-cell RGB LED strip could look like. Note that the fixtures have the LED Strip tag assigned to them.
In order for Beam for Max to know about the capabilities of the lights you are adding to the fixture patch (e.g. that the 1st DMX channel controls red, 2nd green, 3rd blue), there needs to be a corresponding fixture description file, known as a fixture profile, in your Max Search Path.
While you can create your own fixture profiles, Beam for Max already features a few fixture profiles for some common fixtures.
You are working with LED strips, which usually consist of a number of 3-channel RGB or 4-channel RGBW lighting cells. For those you can use the Generic RGB or Generic RGBW profiles. Add as many of the fixtures as your LED strip has cells.
I/O configuration
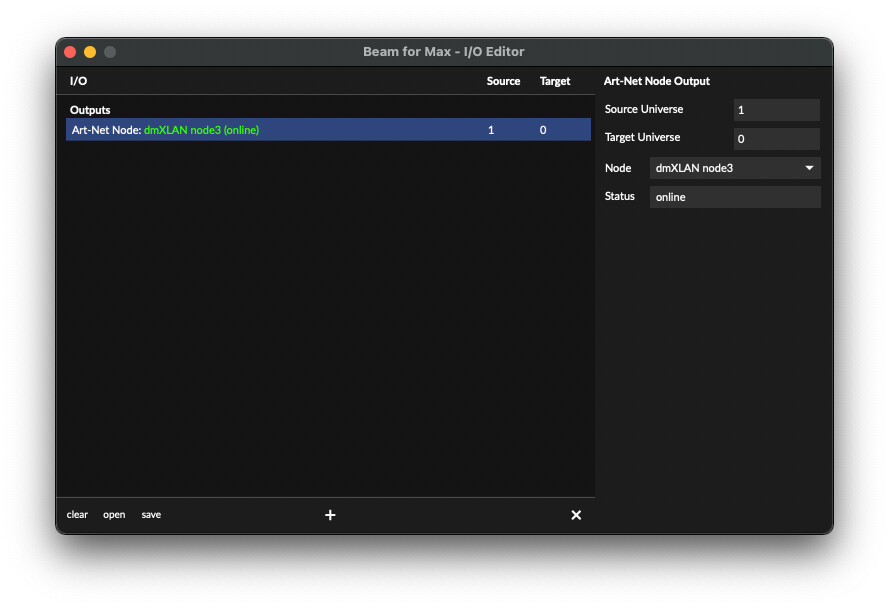
This is where you specify the inputs and outputs that Beam universes will be received from/output to. You can set this by sending a dict prepended with set_io to beam.core (see the help file), or by using the beam.ioeditor abstraction (also found at Extras > Beam for Max > Beam for Max - IO Editor), which internally uses a beam.core:
In the screenshot above we are instructing Beam for Max to route the source Beam universe 1 (as specified in the fixture patch earlier) to the target Art-Net universe 0 of the connected Art-Net Node.
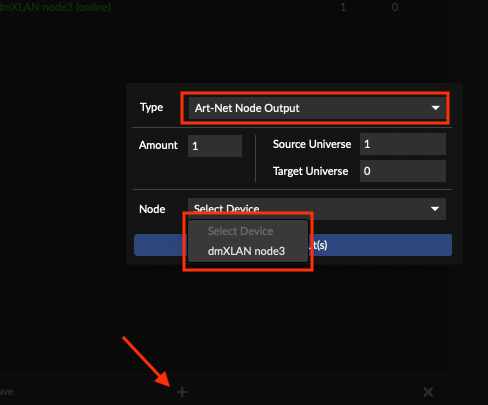
If your network configuration is correct, you should see your Art-Net node appear when you press Plus in the I/O Editor:
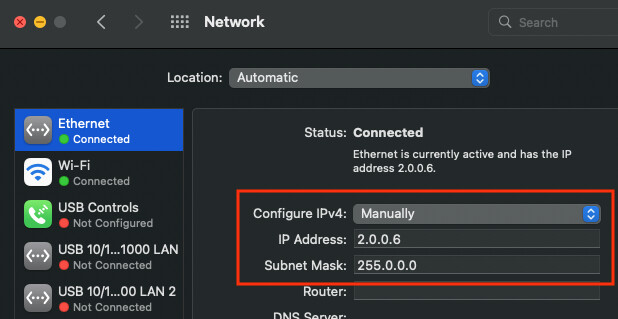
If not, please check that your network interface has an IP address in the same range as your Art-Net node (2.x.x.x or 10.x.x.x), as well as a matching subnet mask (most commonly 255.0.0.0):
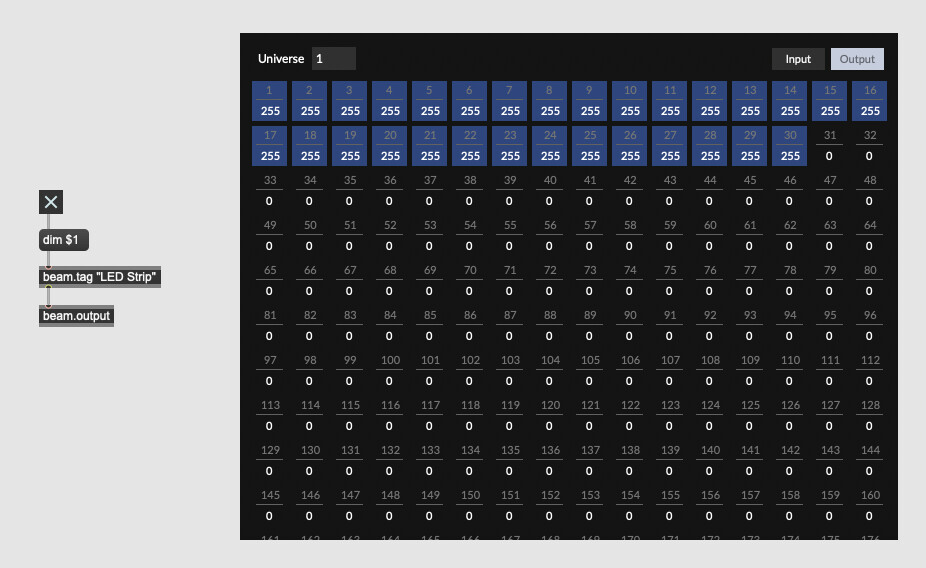
If you have set all of the above, you should be able to turn your lights by sending dim 1.0 to a beam.tag object (with the argument being the tag you have assigned to your fixtures), connected to the beam.output. You can monitor output DMX data using beam.monitor:
If you are still encountering issues, please provide more details about your setup, such as what kind of pixel controller you are using and the channel configuration of the LEDs.