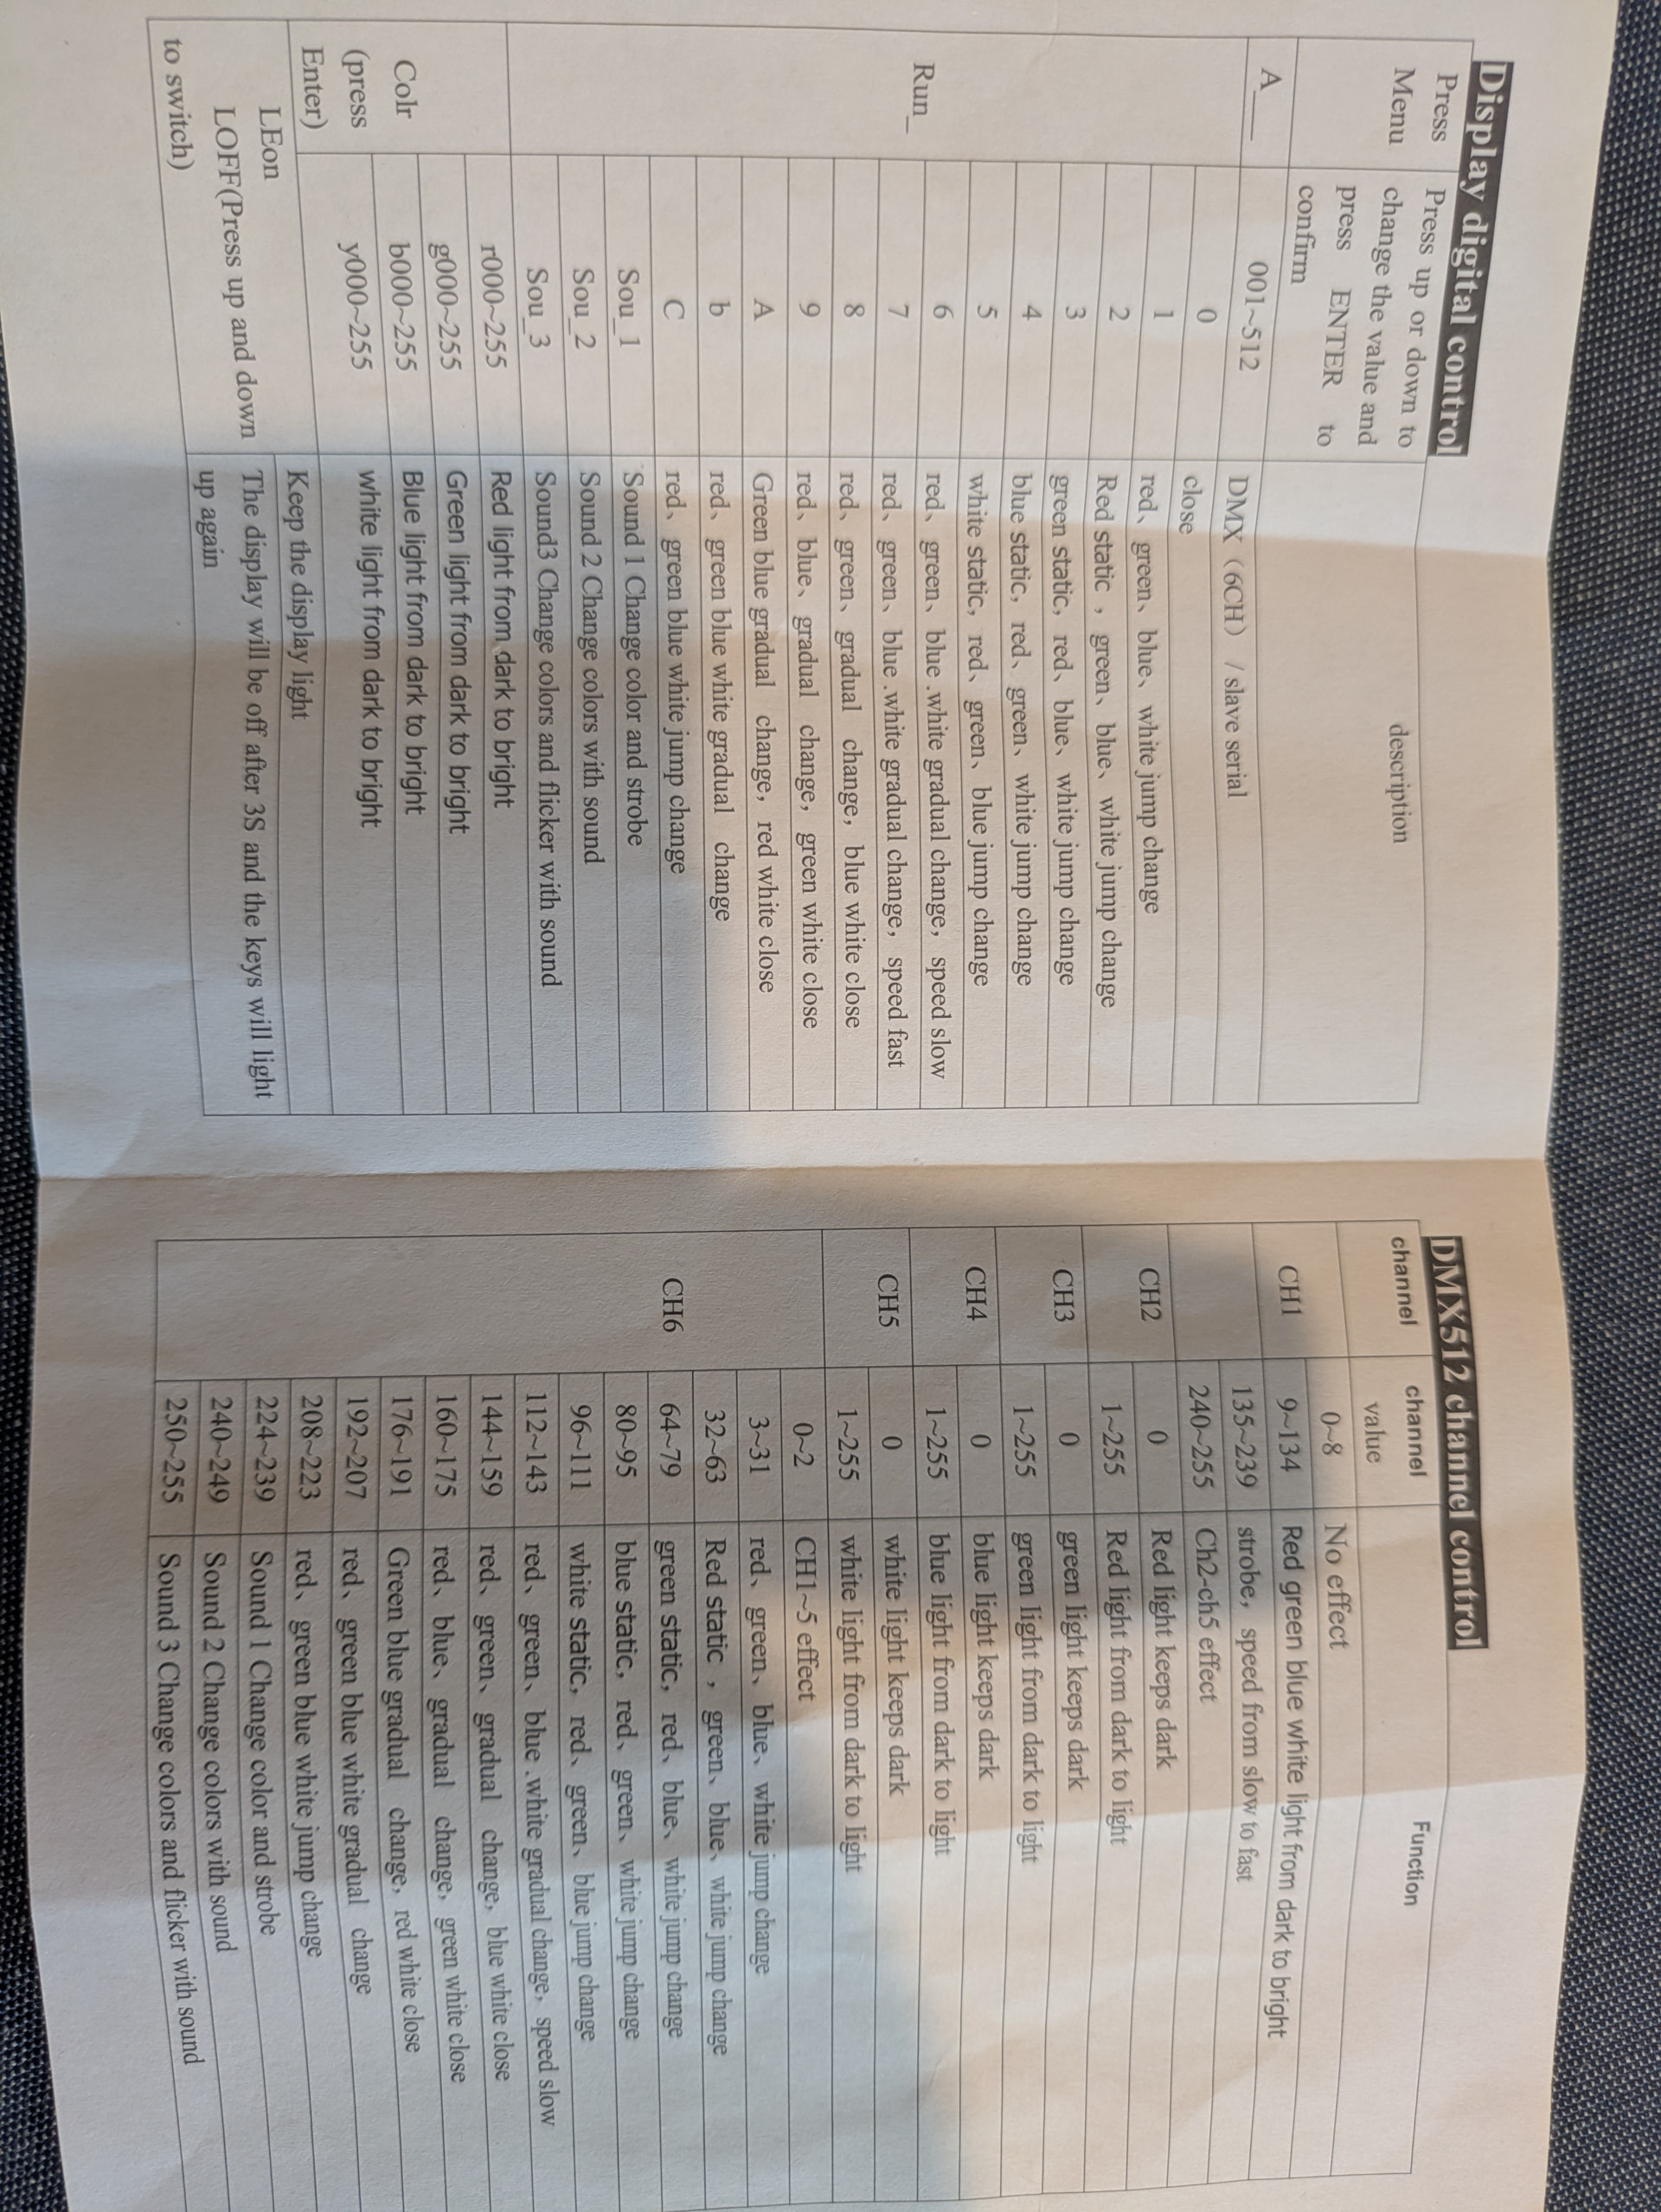
Hey Joel!
The first channel is what we call a “slot-based parameter”. The channel has four slots, where different ranges within the channel have different kinds of effects on the output.
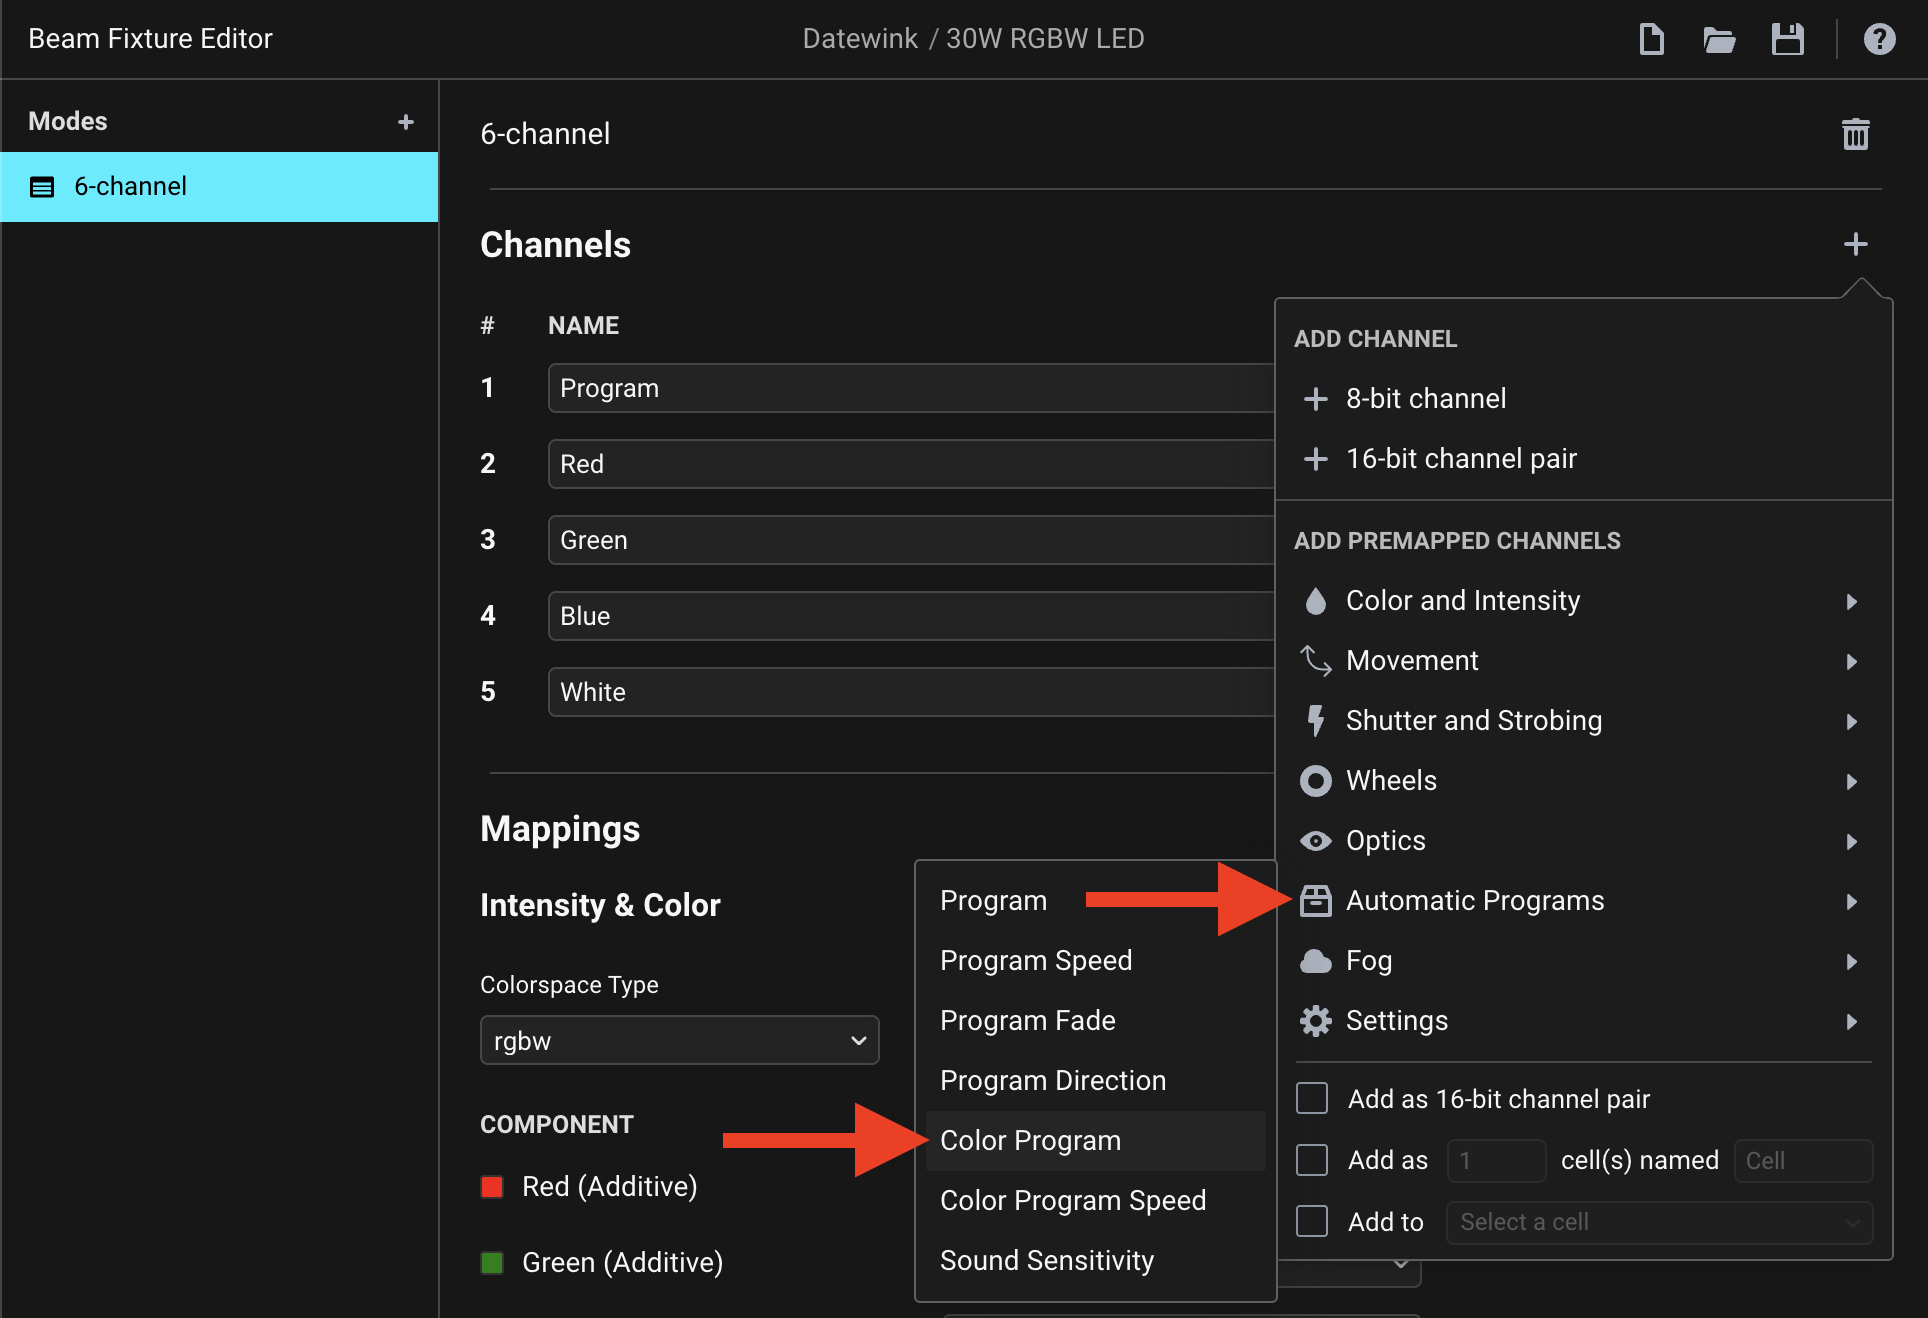
The sixth channel is also a slot-based parameter, having 15 slots.
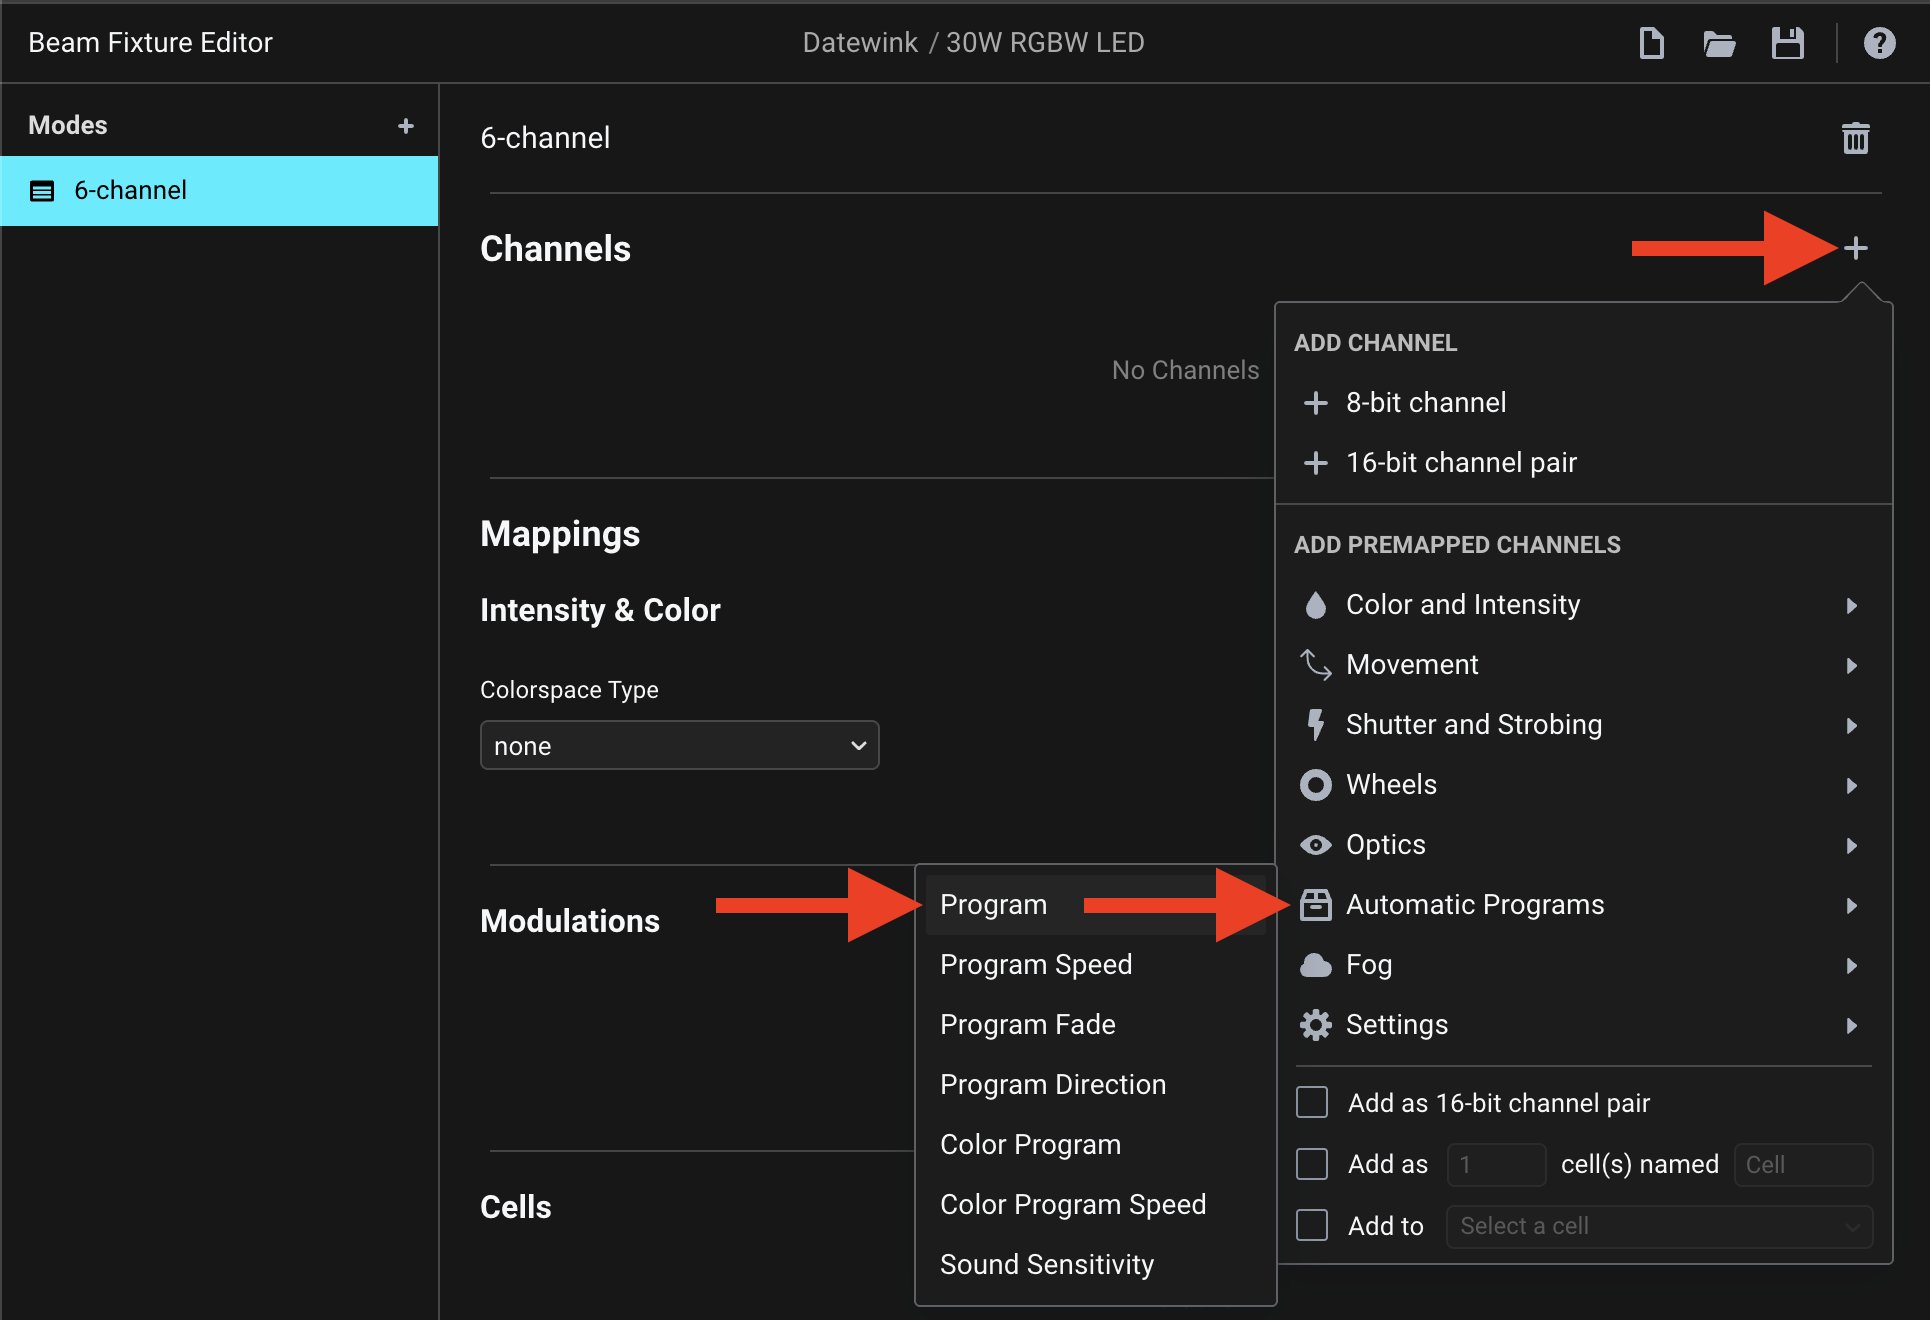
For these channels you can choose one of the “Automatic Programs”:
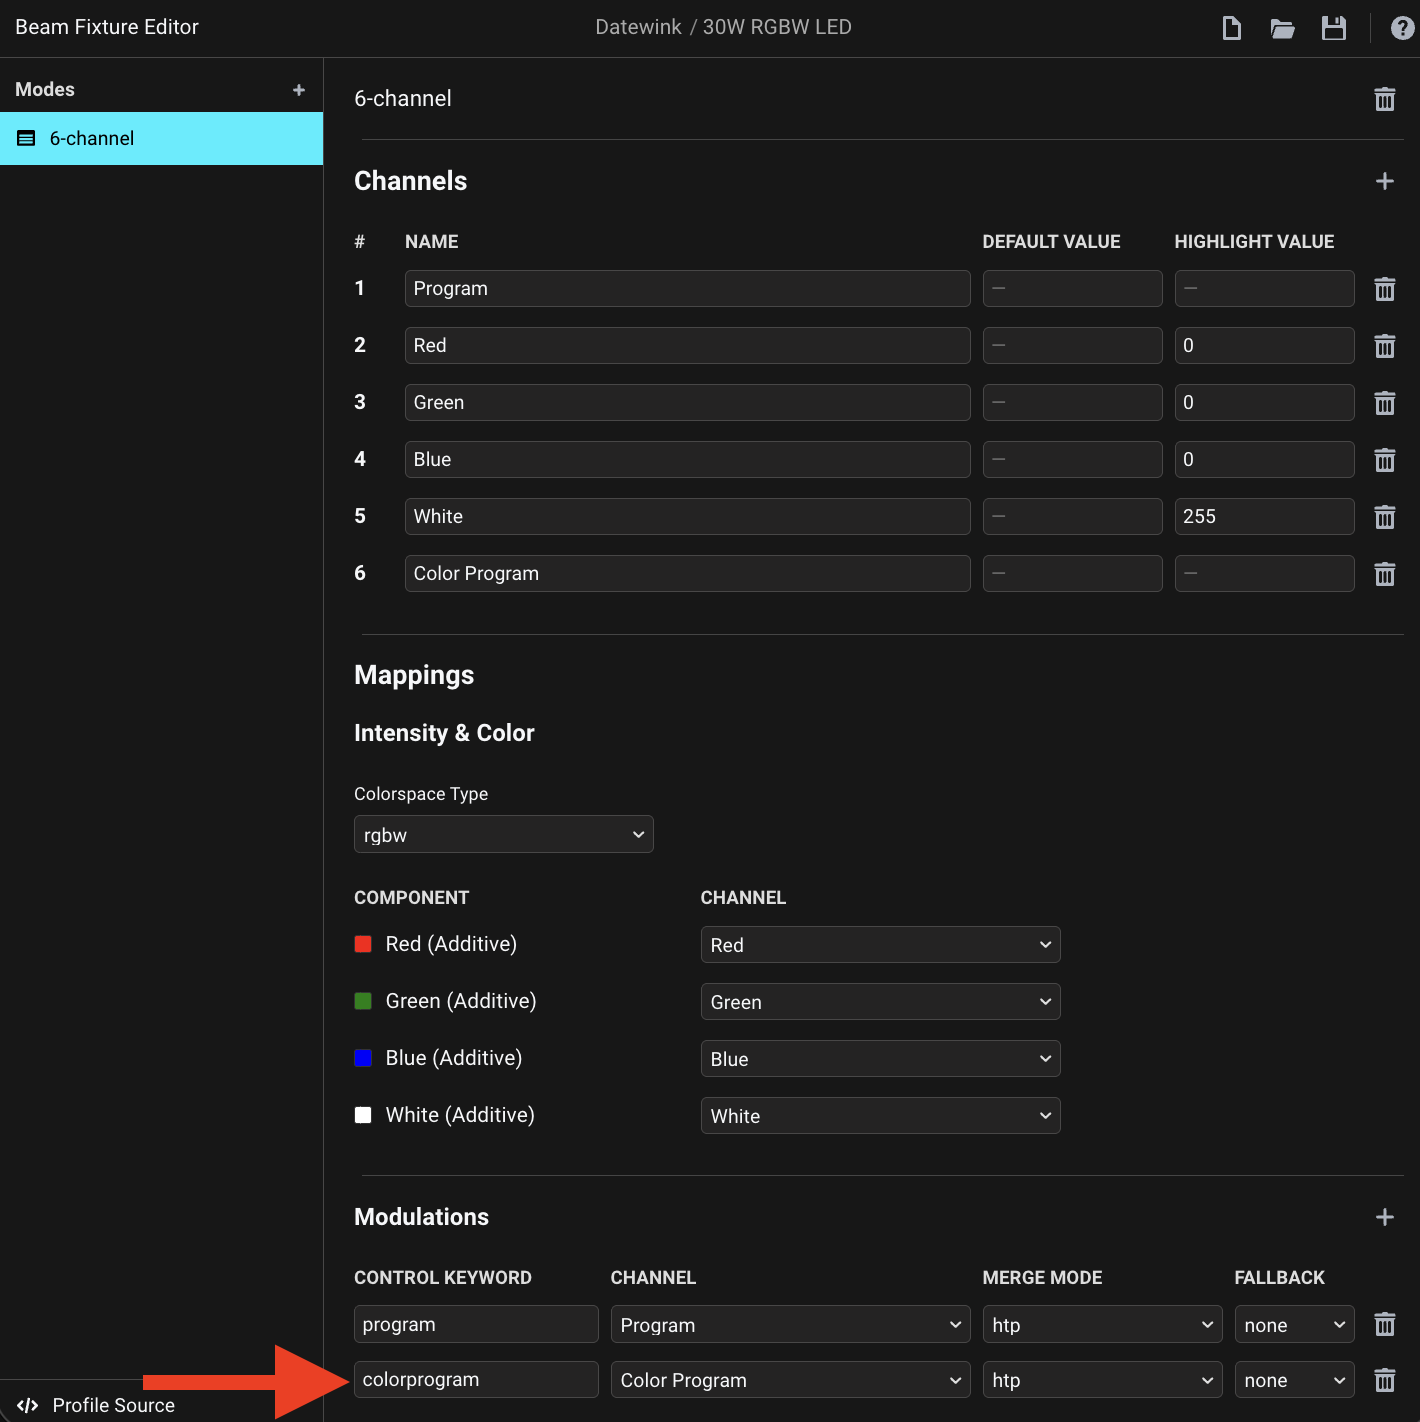
As this is a “Premapped Channel”, this also creates the accompanying Modulation automatically, which will enable you to select and control this parameter in Beam’s devices:
Recommended in this section of the Fixture Editor manual, we’ll use the htp Merge Mode for this Modulation (which is the default for Automatic Programs).
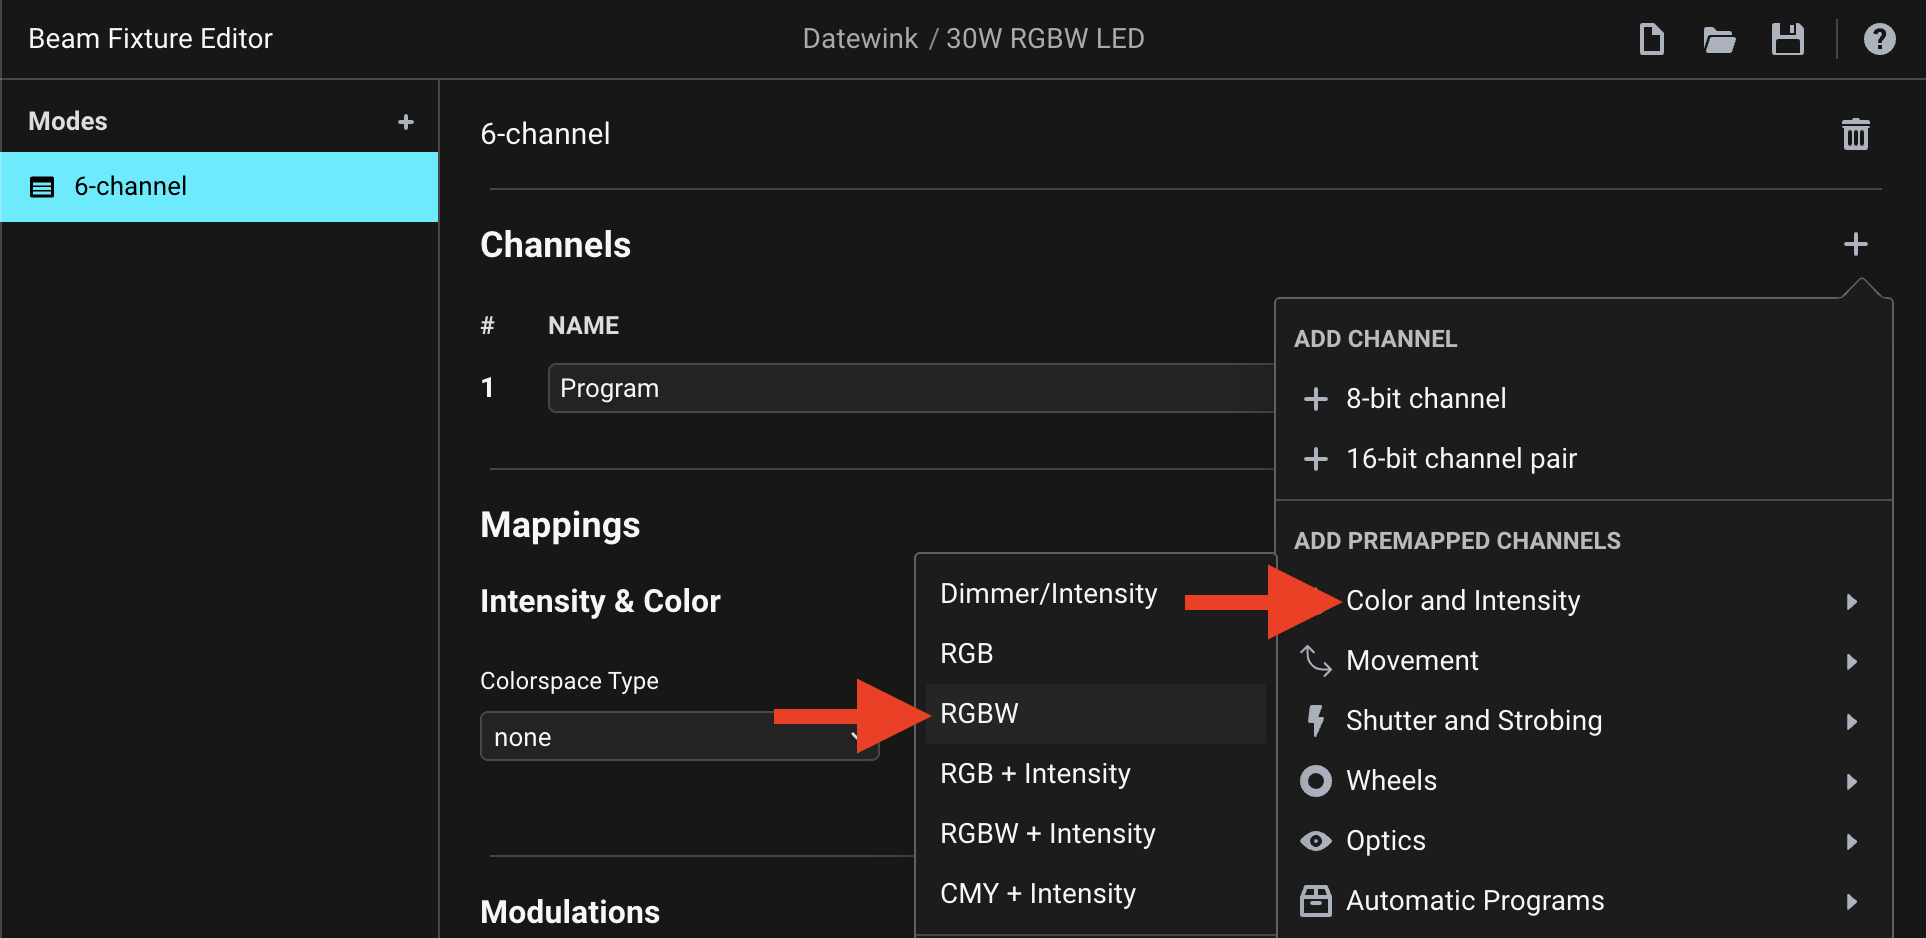
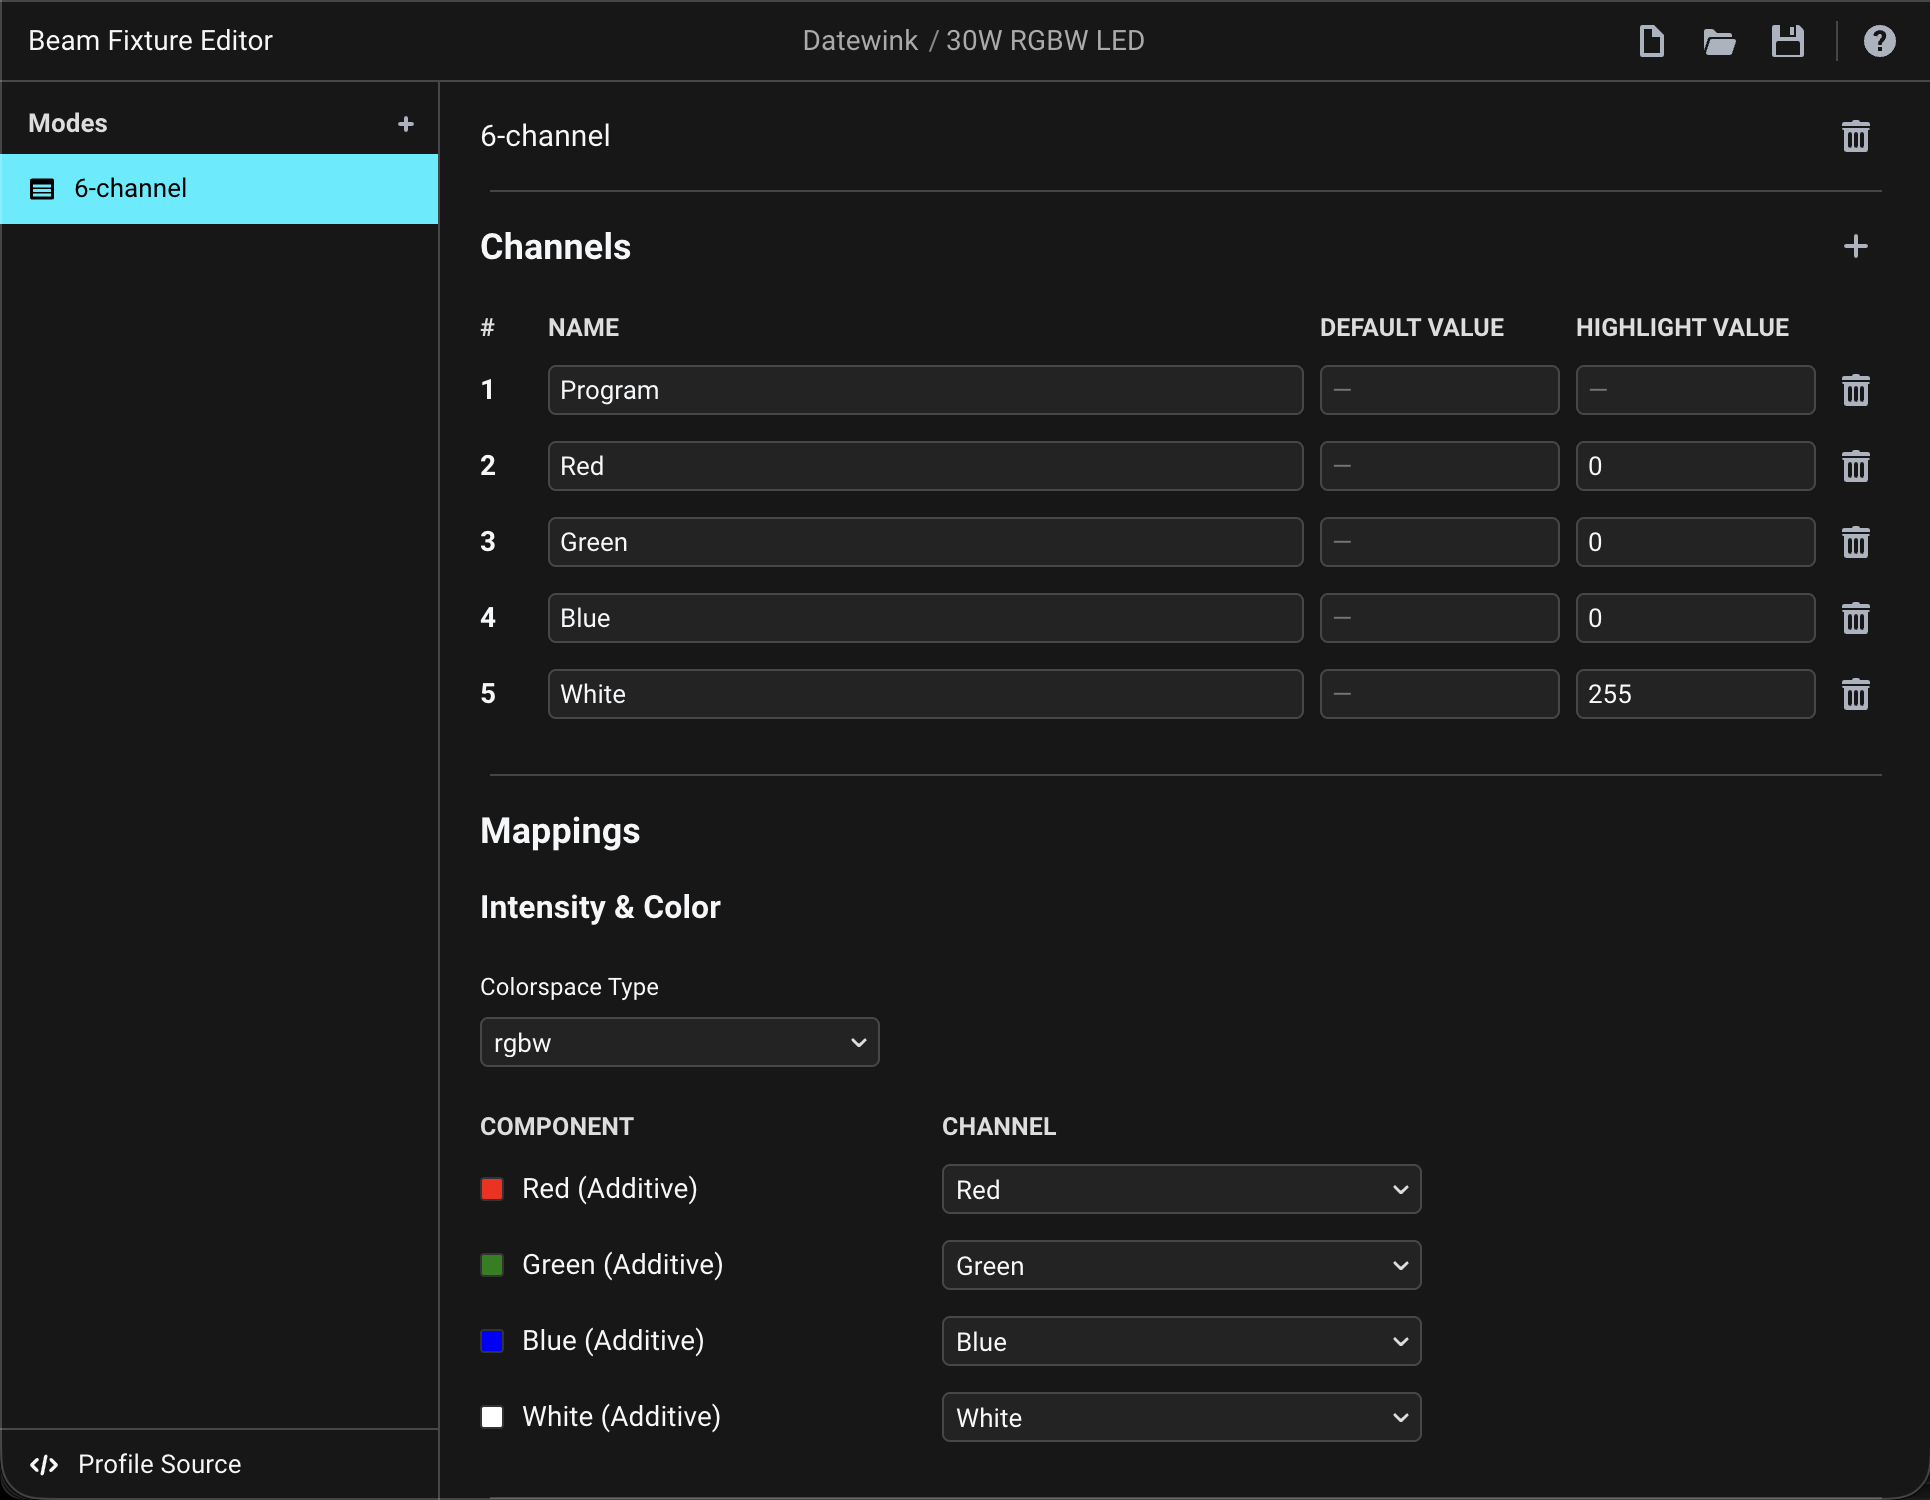
Next, we’ll need to add the RGBW channels, which we can also easily select from the + menu:
This also automatically fills in the Mappings section for these channels, setting the Colorspace Type and configuring the channels for each color component automatically:
Now we just need to add the 6th channel, which we can take a different Automatic Program for. I chose the Color Program in this case, as this channel specifically seems to control color effects (as opposed to the first channel). In the end it doesn’t really matter which of the Automatic Programs you choose, but it helps to pick one that describes the channel’s function the best way:
This again adds the accompanying Modulation automatically:
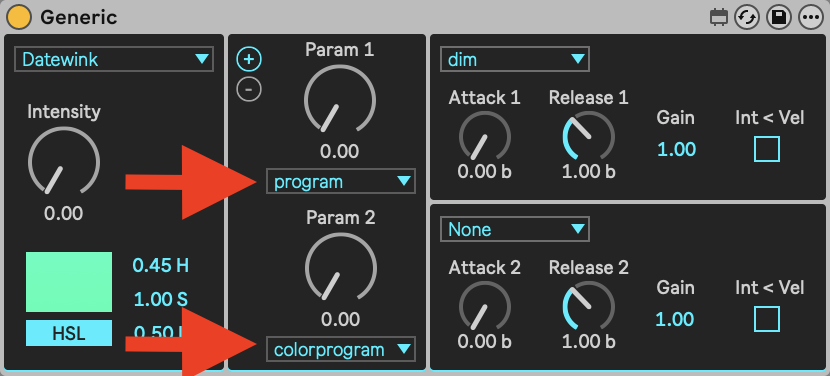
And that’s it! Just save/download the profile and load it into Beam. Instructions can be found here.
In Generic, after adding the fixture to the patch and assigning a tag to it you can select and control the Program and Color Program parameters like this:
You can download the finished profile here: Datewink 30W RGBW LED.sbf (1.3 KB), but I recommend creating it yourself, just so you’ll get the hang of it