Hi @true.murra, thanks for getting in touch and sharing your fixture profile!
Suggested adjustments to the fixture profile
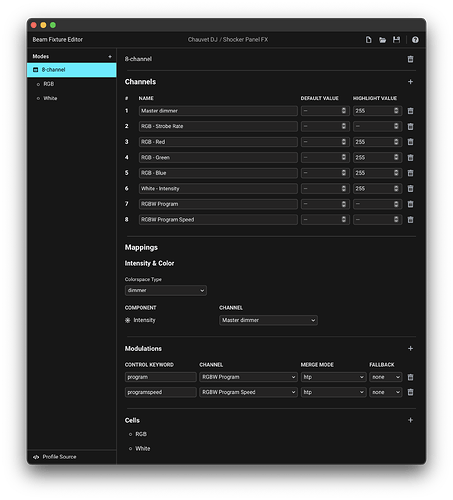
While the profile you’ve shared may already be useable, I would suggest a few changes to the way you’ve assigned the Mappings in the fixture profile that will give you a better control over this specific fixture.
For reference:
- Chauvet DJ Shocker Panel FX - official website
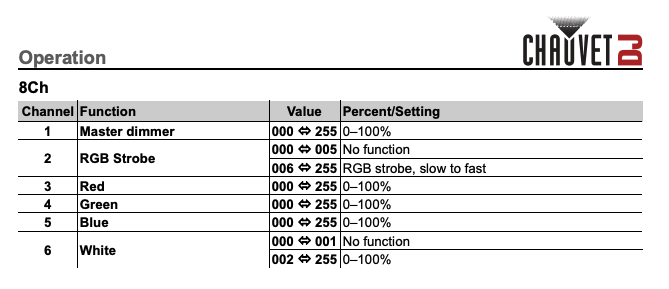
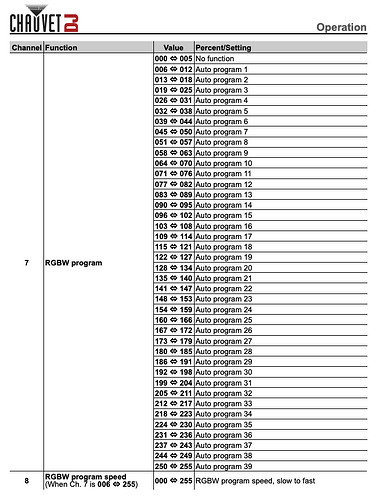
- Chauvet DJ Shocker Panel FX - user manual (incl. the DMX chart)
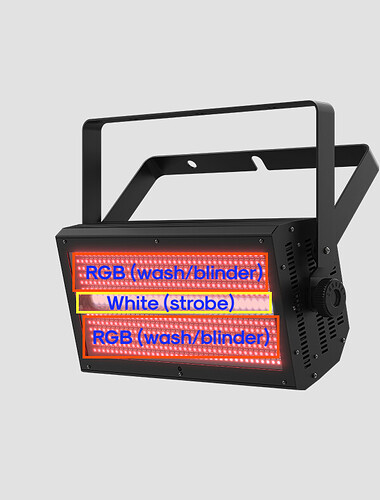
In your fixture profile you mapped the Intensity, Red, Green, Blue and White channels all as components of a single rgbwi Colorspace Type. Using rgbwi or rgbw makes sense when you have a fixture where the white LEDs are directly used for additive color mixing of the same “fixture face” as RGB LEDs. However, this fixture actually has two separately addressable cell sections (basically separate fixtures within a fixture) - RGB wash/blinder and White strobe:
The channels of this fixture in 8-channel mode control different sections:
| # | Channel function | Control unit |
|---|---|---|
| 1 | Master Dimmer | entire fixture |
| 2 | RGB Strobe | RGB wash/blinder section |
| 3 | Red | RGB wash/blinder section |
| 4 | Green | RGB wash/blinder section |
| 5 | Blue | RGB wash/blinder section |
| 6 | White | White strobe section |
| 7 | RGBW program | entire fixture |
| 8 | RGBW program speed | entire fixture |
When you map the fixture as you did, Beam will treat it all as a single section, and you will not be able to e.g. have both the RGB and White sections at 100% at the same time.
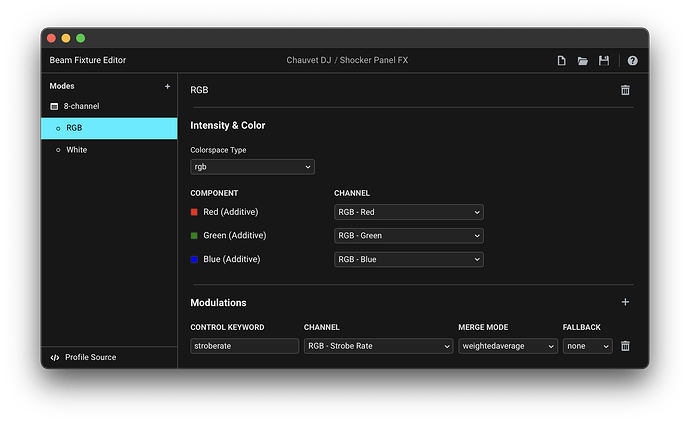
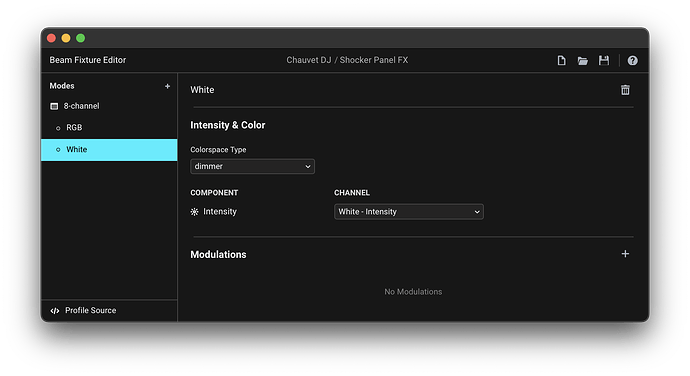
I would therefore suggest assigning the following mappings, using Cells:
-
fixture base / main section:
dimmerColorspace Type →Master dimmerchannelprogramandprogramspeedModulations →RGBW ProgramandRGBW Program Speedchannels (or you can skip these if you don’t need them)
-
RGB Cell:
rgbColorspace Type →Red,Green,BluechannelsstroberateModulation →RGB - Strobe Ratechannel
-
White Cell:
dimmerColorspace Type →Whitechannel
Here is the resulting fixture profile: Chauvet DJ Shocker Panel FX.sbf (2.3 KB)
You can read more about creating fixture profiles for fixtures with cells in the manual:
- Overview | Showsync Support
- Creating a new fixture profile | Showsync Support
- Adding premapped channels | Showsync Support
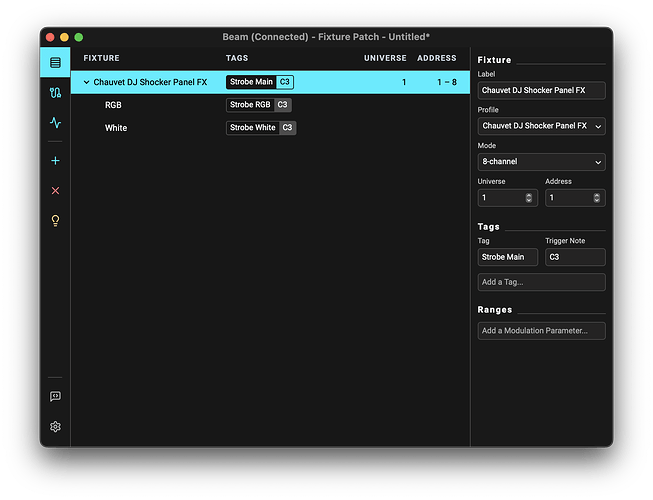
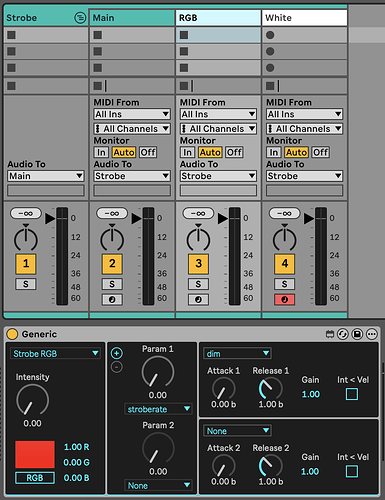
Once you add the fixture to the Beam’s Fixture Patch, you can assign a separate tag to each section:
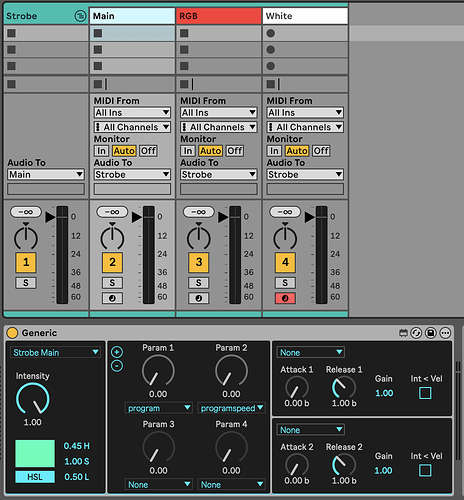
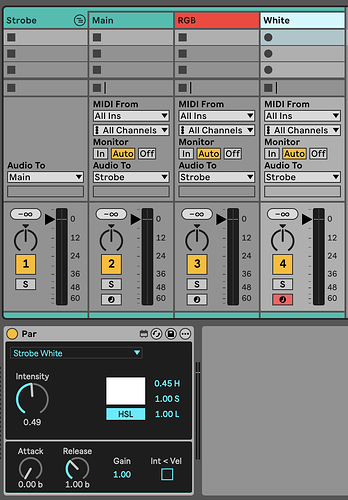
In Live, use a separate device to control each section:
(Main intensity can be always at 100%)
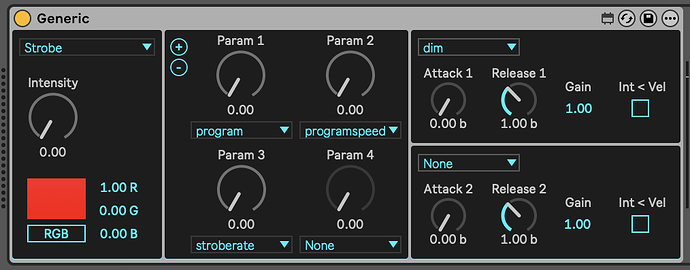
If you don’t need this level of control, you can also just assign a single tag to the entire fixture and use just a single device:
However, that may have some unexpected consequences, such as the white section turning on even when the selected color is not fully white.
Generic’s Intensity dial vs. dim keyword
Im still confused about the relationship between the intensity knob and the dim knob under parameters since they do the same thing,
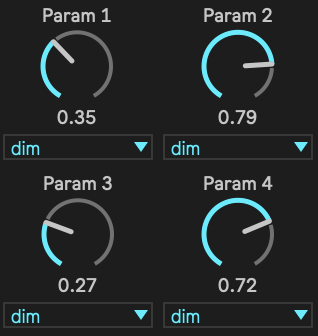
The Intensity dial and the dim parameter in the Generic device indeed accomplish the same thing. However, selecting the same parameter for multiple param slots of the Generic device lets you address sub-groups of fixtures in a tag, so if you e.g. have 4 fixtures within a tag, you could select dim 4 times and each dial would individually address one of the 4 fixtures:
If you only have a single fixture, you can just use Generic’s Intensity dial.
You will also encounter the dim keyword in Beam for Live’s effects (e.g. LFO), where selecting it applies processing on intensity.
Generic: MIDI note-triggered envelopes
Also c3 isnt triggering anything , i can only adjust the light with parameters.
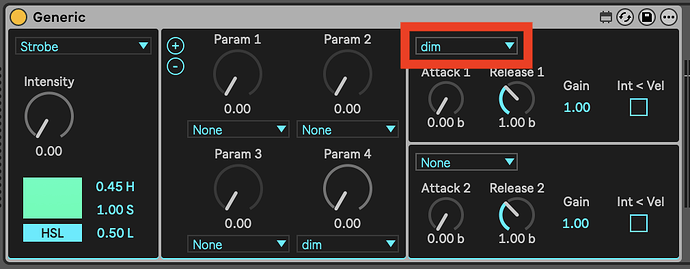
That’s most likely because you still need to select dim as the parameter to control with one of Generic’s envelopes:
Hope this clarifies things a bit. Please let us know if you have any further questions.
