I’m having a blast learning BEAM and trying to get my head around ways to use Ableton’s tools to accomplish some of the same things that a lighting console would do. I realize a lot of power comes from the idea of using arpeggios to control lighting effects.
I appreciate the spread control in the LFO tool for creating chase effects. In many lighting consoles, it’s possible to create some patterns by offsetting the selection of lights. For instance, if you have 12 lights in a row, you could easily set it to play L to R, R to L, inside out, outside in, and in groups. like (1 +7) (2+8) (3+9) or to split them like (1+2+3+4+5+6) (7+8+9+10+11+12)
Arpeggiators can do a lot but I can’t figure out how to make them play two at once easily. I realize that it’s possible to do some this by assigning the midi notes for different groups, but it’s not practical to have that many groups just for these offset orders. It would be cool to be able to call up different group configurations for chase effects, etc.
Am I making sense? What ideas do folks have for how to accomplish some of these things.
Have a great weekend!
Indeed, Live’s very own effects already make up for a very useful set of tools for triggering lights. Arpeggiators are definitely interesting to use, but every other native MIDI effect can be equally interesting, and even more so once you start combining them in MIDI Effect Racks.
Arpeggiators can do a lot but I can’t figure out how to make them play two at once easily.
I can take this two ways, so I’ll break down both options:
-
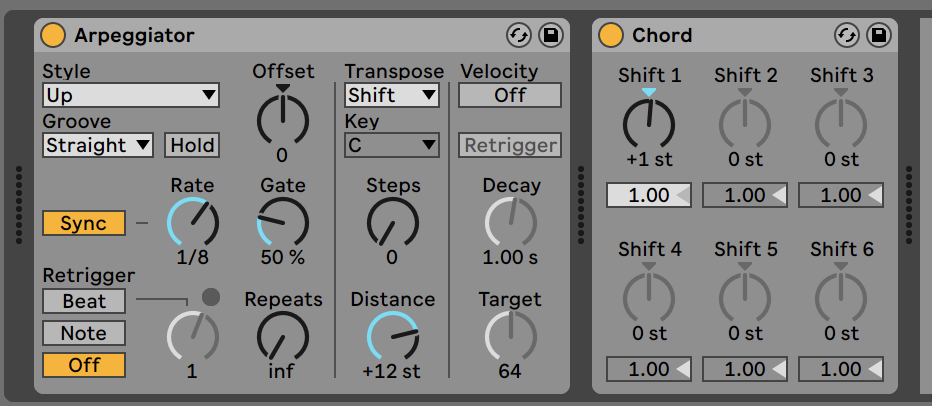
Making an arpeggiator play two notes at once can be easily achieved by placing a Chord device after the arpeggiator, with Shift 1 set to +1 (or any other note you want to pair with the initial one):
-
Playing two arpeggiators at the same time can be done using a MIDI Effect Rack.
-
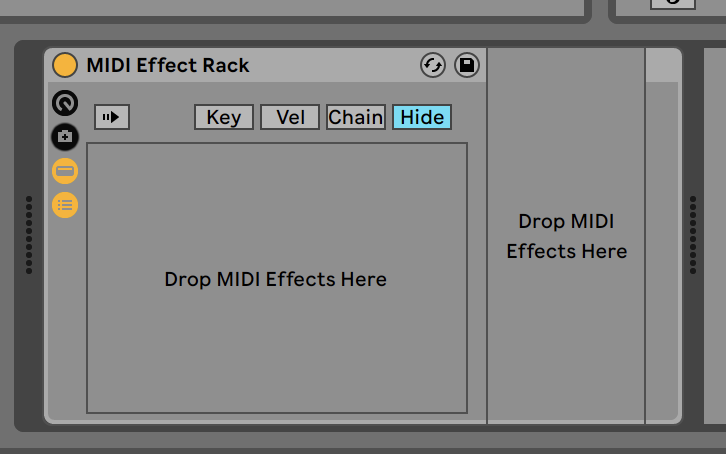
Place an empty MIDI Effect Rack on a MIDI track:
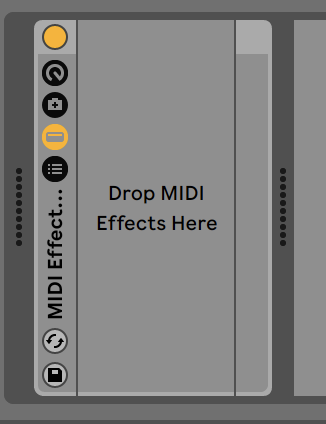
-
Click Show/Hide Chain List button:
-
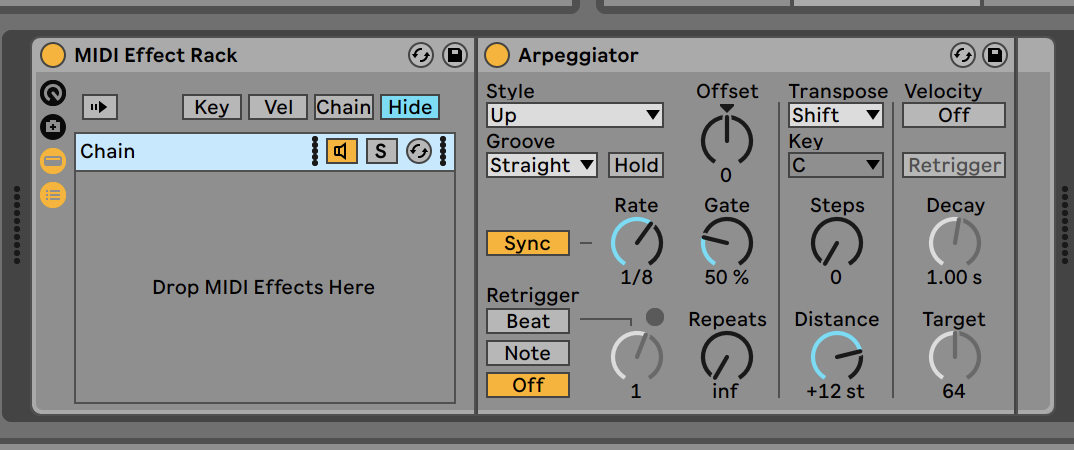
Add an Arpeggiator to one of the two areas, it doesn’t matter in which of the two:
-
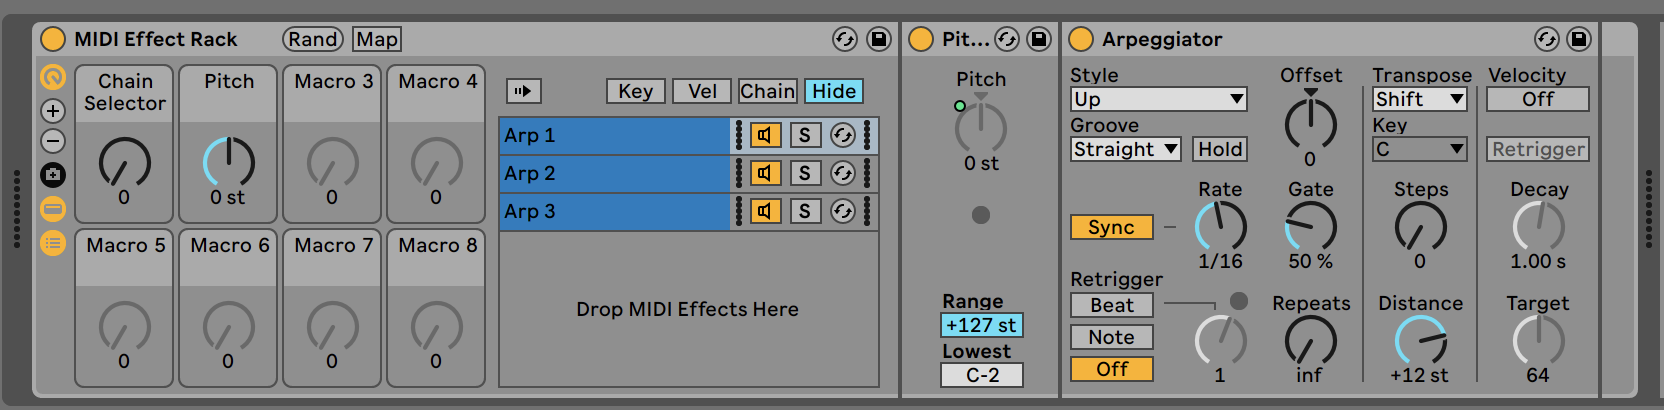
Duplicate the chain as many times as you want. I’ll go with three for this example:
-
Open the Chain Select Editor:
You can set this up multiple ways, but here’s two examples:
- By default the Chain Selector (the vertical blue line at the top) is set to 0. The blue Zones for each Chain below the Chain Selector are also set to 0, hence why the MIDI is passing through all 3 chains. You can move those Zones, for the second and third Chain to “1” and “2” respectively. Then you can automate either the Chain Selector directly, so that for example in different clips, different arpeggiators are used, or you can map it to a Macro and automate that instead. The benefit of using a Macro is that you can limit its range from 0-127 to 0-2, so you can only automate between the three actual values that are in use. To do this, click the Map button in the title bar of the device. In the area where you’d normally see Live’s Browser, you can now edit the min-max values of every mapped parameter.
- Instead of using hard switches between the different chains, you can also overlap them and create crossfades between them by dragging the thinner light blue upper bar of the zones. Then again use the Chain Selector or Macro, and automate it to make transitions between the different arpeggiator outputs.
And finally, you can of course put MIDI Effect Racks inside MIDI Effect Racks… and down the rabbit hole you go.
Let me know if this helps!
Ahhh. Thank you. This is opening up a whole new world of possibilities. With some time I was able to figure out how to get a few of the grouping effects that were in my head out of this whole thing. Offsets were the key for me, plus playing with different arp modes, but I eventually got what I was looking for. Thank you for responding!
Happy to help!
Offsetting the entire pattern is also easy to do using Live’s own Pitch device. If you place one in each Chain, you can map each of the Pitch parameters to an individual Macro, or to a single Macro to control/automate them all at once.